Latest posts

Change layout

Getting Started with MSP360 Backup Free and IDrive e2

Getting Started with MSP360 Backup Free and IDrive e2

In this blog post, we’ll provide a step-by-step guide on how to connect MSP360 Backup free and iDrive e2 storage account. MSP360 Backup freeware isn't just a basic tool; it's a comprehensive solution offering robust features, including recently introduced image-based backup, object lock, and an impressive increase to 5 TB of free storage. Yes, you read that right – 5 terabytes of free storage to protect your most important files! Continue reading

default featured image

Getting Started with MSP360 Backup and IDrive e2 Storage

Getting Started with MSP360 Backup and IDrive e2 Storage

Read this article to learn how to sign up for IDrive e2, start using MSP360 Backup, and connect your storage account within the solution.

How to Sign up to IDrive e2

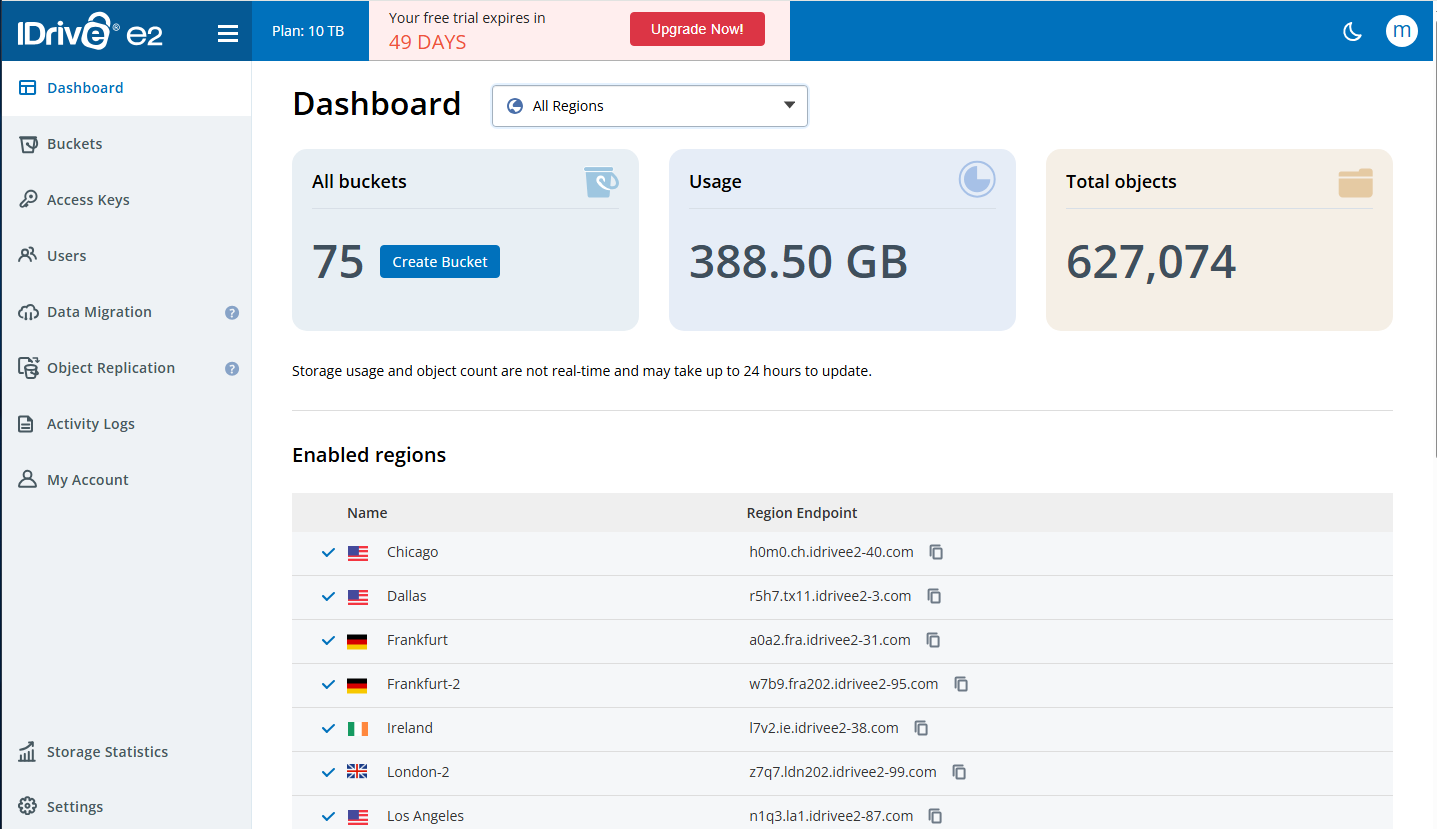
To start your free trial with IDrive e2 storage, visit their signup page and complete the form. Once you’ve submitted the form, you will see the Dashboard, where you can manage buckets, files, and settings.

IDrive e2 - dashboard

Create Access Key and Secret Key

To add IDrive as a storage destination, you need to create the access key and secret key pair. To do that, proceed to the Access Keys tab in your IDrive e2 console and click the Create Access Key button. Set up a name and select region from the dropdown list. Then, assign permissions and buckets for this access key. Once that’s done, your access key and secret key pair will be generated automatically. Please note that this information appears only once - you need to download or save it immediately. Please also note that permissions for the access key that were already configured cannot be modified: to change roles or rights for the access key you need to delete the existing access key and create a new one. 

Create a Bucket

To create a new bucket, you need to enable preferred geolocation first. This can be done on the Dashboard page. Once that’s done, navigate to the Buckets tab in your IDrive e2 account, and click Create Bucket. Configure the settings for this bucket and specify public or private access, enable encryption and specify whether you want to enable object lock (immutability) or not and if you want to enable Versioning with specific retention settings for this bucket.

Select the Right MSP360 Backup Edition

Now you need to choose the appropriate MSP360 Backup edition based on your data protection needs:

  • MSP360 Free Backup software is completely free of charge, and suitable for data protection needs of individual users looking for simple desktop backup software. 
  • MSP360 Backup Pro supports up to 5 devices and adds more flexibility, including server and VM backup capabilities but it doesn’t offer centralized web-based control.
  • MSP360 Managed Backup is the complete solution for MSPs and businesses managing multiple endpoints. It features centralized management, multi-tenant architecture, compliance tools, and scalable pricing.

Getting Started with MSP360 Backup

To start using MSP360 Free or MSP360 Standalone Backup, download the agent on your target endpoint. Once the backup agent is downloaded and installed, you will be able to choose between a solution for personal use (MSP360 Backup Free) and a solution for managing up to 5 devices (MSP360 Backup Pro).

Configure MSP360 Backup for IDrive e2 Storage

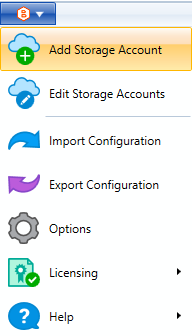
To add IDrive e2 as a storage destination in MSP360 Backup Free or MSP360 Backup Pro, launch the application, and click the Add New Account button in the menu.

Add storage account


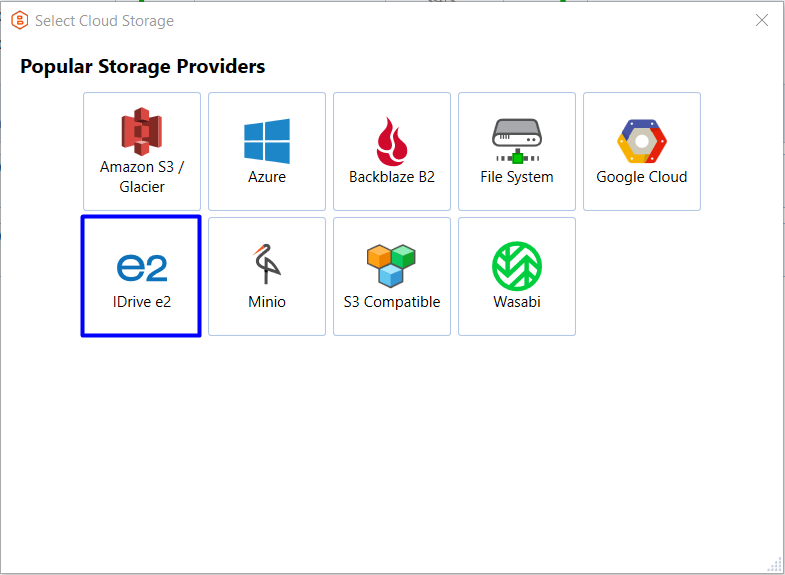
Then, select IDrive e2 from the list, enter the account's display name, access key, secret key and select bucket from the drop-down list.

IDrive e2 - add storage account

#image_title

On this screen you can also enable Object Lock (immutability). This feature, if enabled during bucket creation, protects your data from being modified or deleted, ensuring maximum data safety. 

Once you have specified all the required information, click OK. You will see your new IDrive e2 storage account displayed in the list of accounts.

Creating a File Backup Plan

To start backing up your data to IDrive e2, click the Files icon in the upper navigation (if you’d like to proceed with file-based backup creation), or click the Image Based icon (if you’d like to create an image-based backup plan).

File and Image Based


Follow the backup plan wizard to the second step, and select IDrive e2 storage there. 

On the next steps of the backup wizard, you will be able to customize scheduling and tailor it to your needs. 

Schedule

Also, you can configure retention policy settings and specify how long you need to keep your file versions.

Configure MSP360 Managed Backup for IDrive e2 Storage

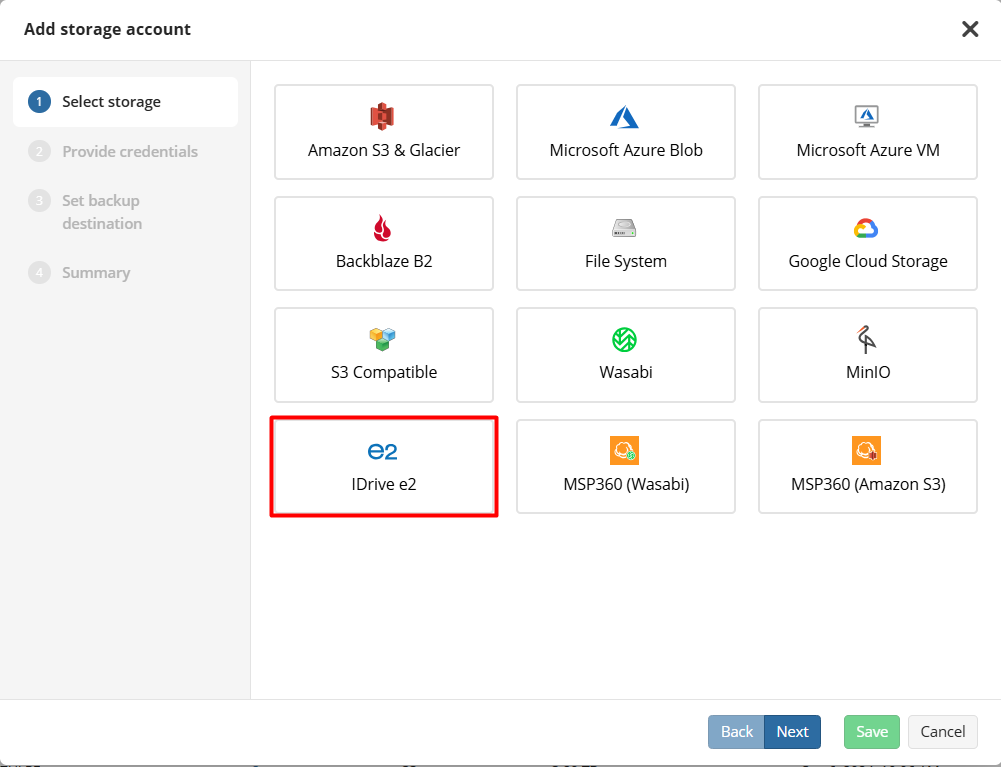
To add IDrive e2 as a storage destination in MSP360 Managed Backup, go to the Backup tab, and click the Storage Accounts button. Click Add Account and select IDrive e2 from the list.

add IDrive e2


On the next step, you need to specify the display name for the backup destination, and access and secret keys to access the specific endpoint associated with the specific region in the storage. Once that's done, proceed to the next step where you can enable Object Lock.

Please note that Object Lock must be enabled when the bucket is first created. You won’t be able to enable it later for buckets that were created without it.

To start backing up data to IDrive e2, find the required endpoint in the Computers tab, click the status bar in the Backup Plan Status column and in the slide-in that appears click the Add New Plan button. Choose between file-level and image-based backup, follow the backup plan wizard to the second step and select IDrive e2 as a storage destination.

In MSP360 Managed Backup, you can also customize schedule and retention policies for your backup plan. Forever forward incremental backup retention for IDrive e2 is available in both MSP360 Backup Pro and MSP360 Managed Backup - this approach allows you to save storage space and a significant amount of money since it ensures quicker backup times.

How to Start Using MSP360 Backup with Backblaze B2

Getting Started with MSP360 Backup Free and Backblaze B2

Getting Started with MSP360 Backup Free and Backblaze B2

Read this blog post to explore MSP360 Free Backup software and BackBlaze B2 cloud storage.

MSP360 Backup Free software is a robust solution designed to provide enterprise-grade backup capabilities to individuals and small businesses at no cost. For cloud backup the solution provides native integration with Backblaze B2 cloud storage service. 

Overview of integration with MSP360 free backup software

MSP360 free Backup software is designed for individuals who need small-scale data protection for Windows, macOS and Linux desktops. With enterprise-grade features such as file-level and image-based backup, customizable schedules, retention settings, and more, you can safeguard your valuable data effortlessly at no cost.

MSP360 Backup freeware allows you to store your backup data on a local device as well as in the cloud storage. Backblaze B2 is a low-cost, high-performance solution for individuals looking for offsite storage. Visit their website to learn more about Backblaze B2 storage.

Enterprise-Grade Features, Absolutely Free

You might think "free" means limited, but with MSP360 Backup Free, that's simply not the case. This isn't just basic file syncing; it’s a comprehensive backup solution packed with features typically found in premium software. We're talking about file-level and image-based backup, giving you the flexibility to protect individual documents or create full system snapshots. Plus, you get customizable schedules to automate your backups, ensuring your data is always current, and intelligent retention settings to manage storage space efficiently. All of these powerful tools are available to you, at zero cost. 

Backblaze B2 for Backup Storage

While local backups are crucial, true disaster readiness comes from following 3-2-1 rule implying offsite storage. This is where Backblaze B2 can be one of the options to considered. Known for its incredibly competitive pricing and reliable infrastructure, Backblaze B2 provides the perfect cloud destination for your MSP360 backups. This integration means you can send your valuable data to a secure, redundant, and highly available cloud storage without incurring significant monthly costs. It’s a good pairing for individuals who need professional-grade offsite protection on a budget.

So, why choose MSP360 free backup software with Backblaze B2 for offsite storage? Native integration is built using API to ensure smooth data transfer and retrieval, optimizing for speed and reliability. Our software is designed to communicate seamlessly with Backblaze B2's storage infrastructure, allowing you to easily manage your cloud backups directly from the MSP360 Backup Free interface. This means less hassle for you and more focus on what matters most: keeping your data secure. Whether you're creating buckets, managing application keys, or setting up your backup plans, our software streamlines the process, making cloud backup accessible to everyone. Here are the steps for getting started with MSP360  free backup software with Backblaze B2: 

Step1. Create a Backblaze B2 Storage Account

Step 2. Create a Bucket

Step 3. Create Application Key

Step 4. Download, install and activate MSP360 Backup freeware 

Step 5. Add your Backblaze B2 storage account as a backup destination

Step 6. Create a Backup Plan

Step1. Create a Backblaze B2 Storage Account

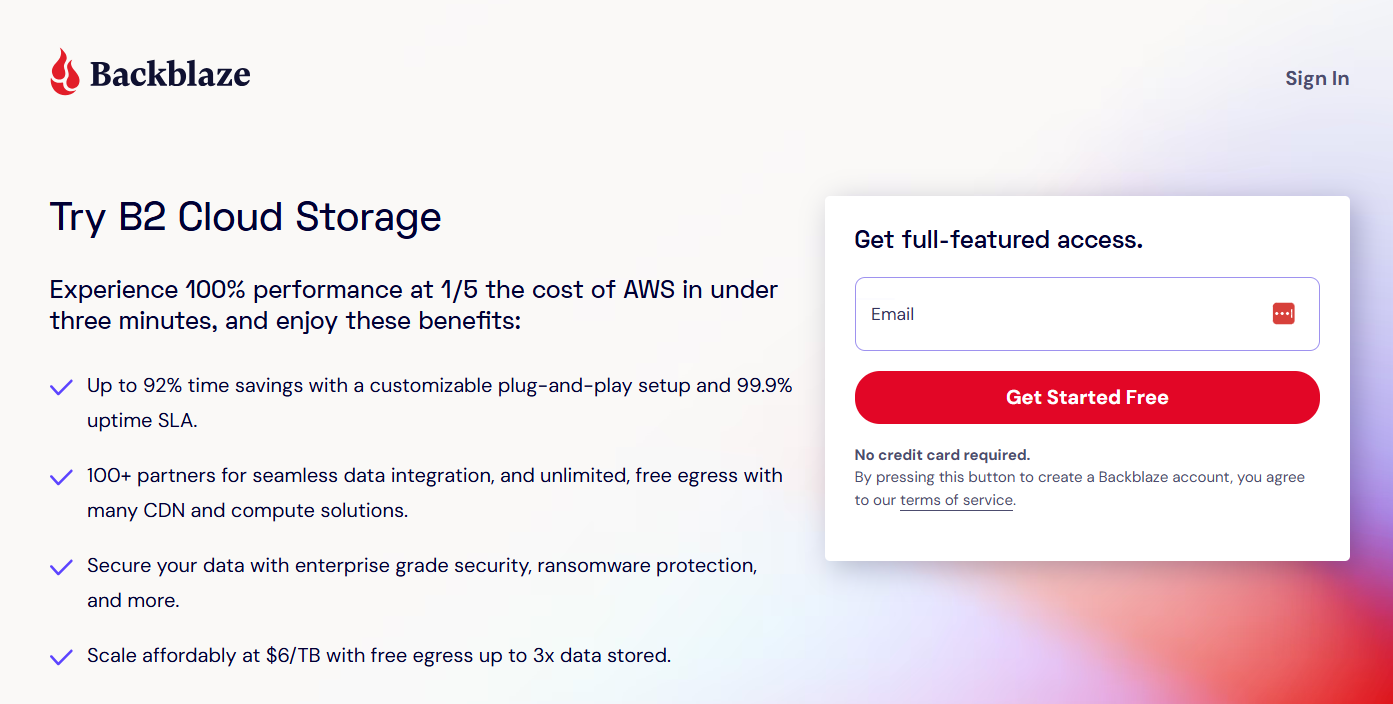
If you already have a Backblaze B2 storage account, you can proceed to Step 2. If not, visit Backblaze B2 free trial page and fill in the form. Once that’s done, you are all set. 

Backblaze B2 start free trial

Step 2. Create a Bucket

To create a bucket in Backblaze B2, you need to come up with a unique bucket name, specify access settings for the files, select encryption mode and enable object lock if needed. 

Step 3. Create Application Key

Now, you need to create a non-master application key to connect to a backup service. To do that, find the Application Keys tab in the navigation on the left, and click Add a New Application Key button. You’ll need these keys to connect MSP360 Backup to your Backblaze B2 storage account.

Application key Backblaze B2

Step 4. Download, install and activate MSP360 Backup freeware 

To get started with MSP360 Backup Free, you need to install the solution on your target endpoint. To do that, download the backup agent, and click the Use Home Edition button to activate the software once it’s installed. 

Step 5. Add your Backblaze B2 storage account as a backup destination

To add a new storage account in MSP360 Backup Free, click the Menu icon in the agent and select Add New Storage Account

Add storage account


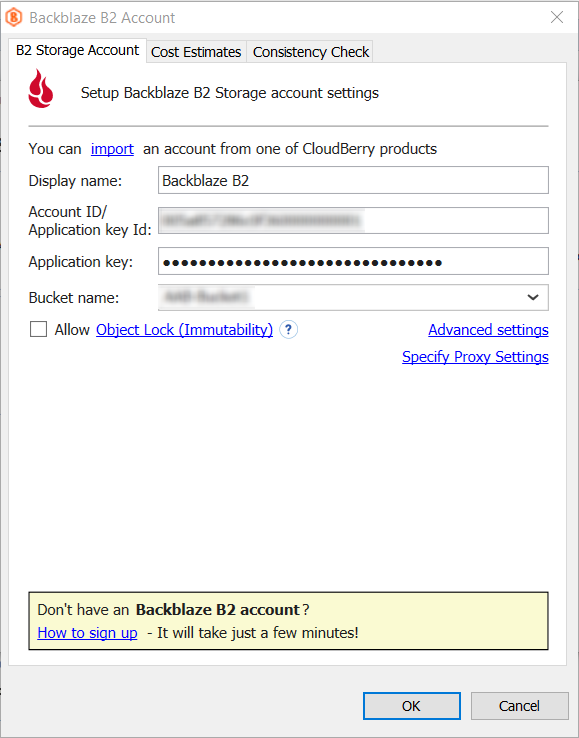
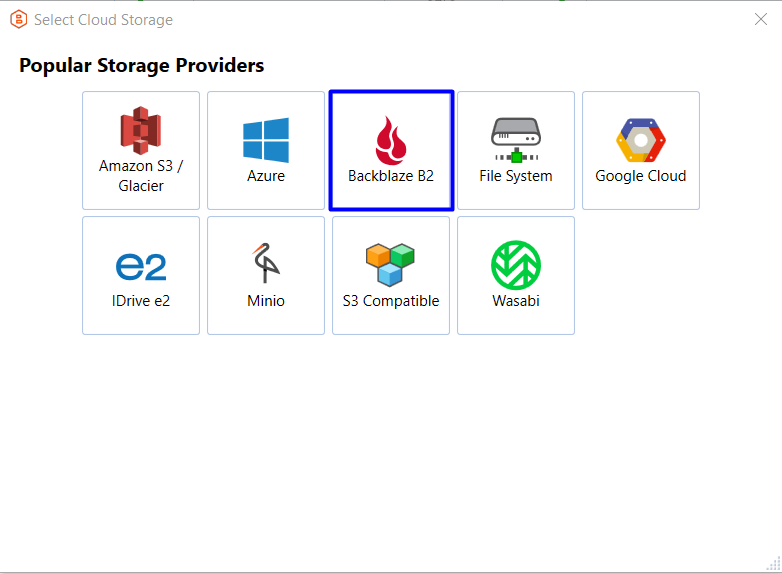
Then, choose the Backblaze B2 icon to connect your storage account. You’ll be prompted to enter the account display name, application key ID, application key, and select a bucket from the drop-down list.

Configure Backblaze B2 account

If you created a bucket with object lock (immutability) enabled, you can check the Allow Object Lock (Immutability) box to activate it in MSP360 Backup Free. Please note that once this option is enabled, you won’t be able to modify or delete your backups until the specified GFS retention period has expired.

Once you have specified all the required information, click OK. You will see your new Backblaze B2 account displayed in the list of accounts.

Step 6. Create a Backup Plan

To create a file-level backup plan, click the Files icon in the upper navigation. 

File backup plan

Then, proceed to the second step of the backup plan wizard to select your Backblaze B2 storage account as a storage destination for this backup plan. 

Select storage

Once that’s done, follow the steps of the backup plan wizard to customize settings for your file-level backup plan. 

In the next steps, you can specify advanced filters for files and folders included in your backup,  configure a backup schedule that fits your IT routines, specify retention settings, and more. 

Alternatively, you can create an image-based backup plan.

Image-based backup plan

MSP360 Backup Free now supports image-based backups with features like entire system restore and bare-metal restore - this ensures that users of MSP360 Backup Free are completely disaster-ready 

Conclusion: MSP360 Backup Free and Backblaze B2

Getting started with MSP360 Backup and Backblaze B2 is quick and simple. This guide walks you through the entire process, step-by-step. From setting up your Backblaze B2 account to creating your first backup plan with MSP360 Backup Free. Don't let data loss be a concern any longer. Discover how effortless and affordable robust data protection can be.

Getting Started with MSP360 Backup Free and MSP360 Backup Pro

Getting Started with MSP360 Backup Free and MSP360 Backup Pro

From this guide, you will learn how to choose the correct MSP360 Backup edition based on your requirements, sign up for the product, and start your first backup plan.

MSP360 Free vs. MSP360 Backup Pro: What’s the Difference?

To select the correct edition of MSP360 Backup, you need to choose according to your use case: if your data protection needs include several endpoints, you should opt for MSP360 Backup Pro, as this solution supports up to 5 devices. In case you need a solution for personal needs (like backing up a laptop at home), then our Free Backup software is the right choice. 

Both backup solutions support file-level desktop backup for Windows, macOS, and Linux, as well as image-based backup for Windows. However, the main difference is that MSP360 Backup Pro also supports backups for Windows Server, SQL Server, and virtual machines.

Getting Started with MSP360 Backup

To start using MSP360 Free or MSP360 Backup Pro, navigate to this website page, and select the required edition. On the next step, find your endpoint’s operating system in the drop-down list, and complete the form. 

MSP360 Backup Free supports backup for Windows, macOS, and Linux, while MSP360 Backup Pro additionally supports Windows Server, Hyper-V, VMware, and MS SQL Server, along with all the operating systems supported by the Free edition.

Once completed, install the solution on your endpoint. Once the backup agent is downloaded and installed, you will be able to choose between a solution for personal use (MSP360 Backup Free) and a solution for managing up to 5 devices (MSP360 Backup Pro).

Create Your First Backup Plan

To start creating your first backup plan, you need to add a storage account first. To do that, click the menu icon in the upper-left corner and proceed to the Add Storage Account section. Then, select the desired storage provider from the list and configure the settings to connect to the storage account.

MSP360 Backup supports the BYOC (Bring Your Own Cloud) approach - our solution is compatible with Amazon S3, Wasabi, Backblaze B2, and other leading cloud providers.
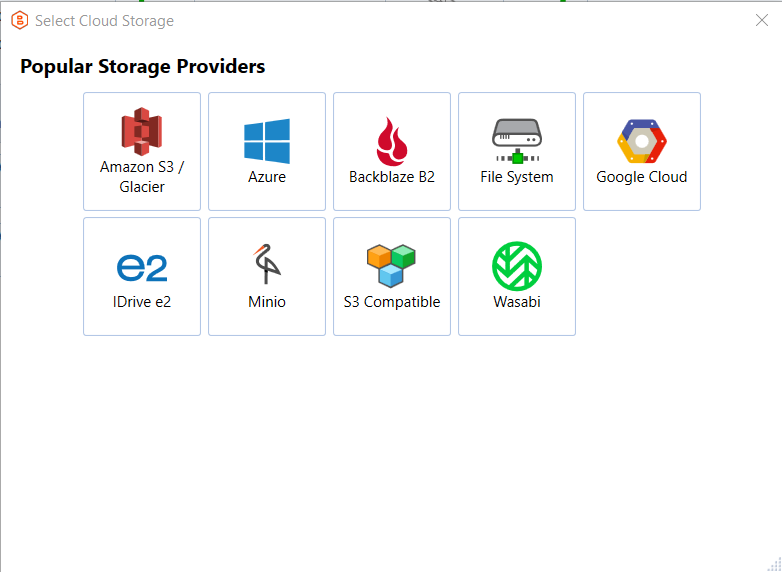
Cloud storage providers


Once your storage account is connected, proceed to the backup plan creation. To start creating your file backup plan, click the Files icon in the navigation panel, and follow the steps in the backup wizard to configure your plan. MSP360 Backup features an intuitive UI and step-by-step backup plan wizards, making setup and maintenance easy.

File backup plan - Free and Standalone


On the Select Backup Storage step, select a cloud storage account where you want to back up your data. Please note that some features that are supported for one storage provider may not be available for others, so it’s important to select the cloud storage based on your specific requirements. For instance, if you choose Azure as your storage destination, you will be able to select a storage class (Hot, Cool, Cold, Archive) based on your needs, while this option is unavailable for Wasabi Hot Cloud storage as Wasabi does not support storage tiering. 

You can also opt for local storage as a backup destination including external hard drive or network locations such as NAS devices.

With file backup, you can select specific files or folders on your endpoint on the Backup Source step. Once you’ve specified files and folders to back up, proceed to the next step. 

Once you reach the Compression and Encryption Options step, you can choose whether to enable these features. MSP360 Backup helps reduce storage usage with built-in compression, minimizing backup size to save space and optimize performance. Also, here you can enable encryption in order to enhance data protection. 

Please note that this feature is not available in MSP360 Backup Free.

In the next steps, you can configure a backup schedule that fits your IT routines. The settings allow for as much granularity as you need: you can schedule backups to run every 10 minutes during work hours, perform a daily backup at 2 AM, or set up a monthly backup to an external drive or cloud storage.

Schedule


Also, you can configure retention policy settings and specify how long you need to keep your file versions. Please note that Intelligent Retention is enabled by default with some storage providers to avoid early deletion fees. For instance, if a cloud storage provider sets a 90-day minimum storage period, and the data was removed on the 30th day, you will be charged a penalty called early deletion fee. 

Also, you can enable Object Lock (immutability) for Amazon S3, Wasabi Hot Cloud Storage and Backblaze B2 to implement the highest level of backup protection possible, and make cloud backups resilient against ransomware, unattended access, and human factors. 

On one of the final steps, Notifications and Logging, we recommend enabling notifications to help identify issues before they impact business operations. Once that’s done, click Next to complete the creation of your backup plan. 

Conclusion

With MSP360 Backup, getting started is fast, simple, and tailored to your needs. Start the free trial today, or contact our sales team if you have any questions. 

MSP Workflow: Core Tasks Streamlined by Backup and RMM Solutions

MSP Workflow: Core Tasks Streamlined by Backup and RMM Solutions

MSPs play a crucial role in ensuring the smooth functioning of IT systems for their clients. Here at MSP360, we understand the importance of routine maintenance and monitoring in maintaining optimal performance and security. That’s why we’ve outlined the key tasks MSPs should perform and the importance of each workflow to help MSPs deliver top-notch IT support.

Continue reading

what_is_backup_as_a_service

What is Backup as a Service (BaaS) Guide: How It Works & Who Needs It

What is Backup as a Service (BaaS) Guide: How It Works & Who Needs It

In this guide we break down what is Backup as a Service (BaaS) , revealing why backing up your organization’s data is one of the most important steps you can take to protect against data loss events, such as ransomware attacks, that could jeopardize your business’s ability to operate normally. Continue reading