This post explains how to sign up for Microsoft Azure account and configure MSP360 Backup to be used with Microsoft Azure.
Sign Up for Microsoft Azure Cloud Storage
You can find a step-by-step instructions on how to sign up for Microsoft Azure cloud storage in the following help article:
Further reading How to Sign Up for Microsoft Azure
Choose MSP360 Backup Edition
MSP360 offers reliable, cost-effective solutions that support multiple cloud storage options and ensure the security of your backups.
- MSP360 Free Backup software is ideal for individuals who need both file-level and image-based backup for personal use.
- MSP360 Backup Pro offers more flexibility, supporting up to 5 devices and providing additional features like server and VM backup. However, it lacks centralized web-based management, as backups are managed locally.
- MSP360 Managed Backup is the full-featured solution built for MSPs and businesses managing multiple endpoints. It includes centralized management, compliance support, multi-tenant features, and scalable pricing.
Download and Install MSP360 Backup
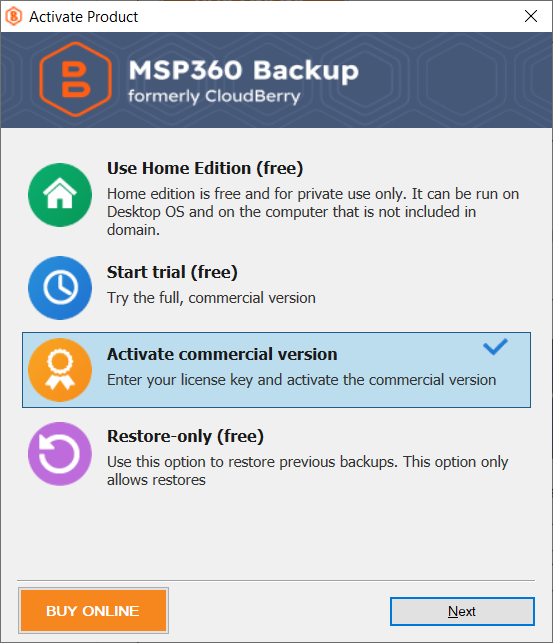
To download the latest version of MSP360 Free or MSP360 Backup Pro, visit the website page, click Download Now, select your endpoint’s operating system from the drop-down list, and fill out the form. Once completed, click the Download button. Then, you will be able to choose between a solution for personal use (MSP360 Free Backup) and a solution for managing up to 5 devices (MSP360 Backup Pro).
#image_title
Starting MSP360 Managed Backup Free Trial
To start your MSP360 Managed Backup free trial, visit the product page and click the Start Free Trial button. Once you fill out the form, you will be redirected to the web-based management console. Please note that upon registration, you will receive 2 TB of Wasabi Hot Cloud storage by default. However, you will be able to add Azure as a storage destination later in the console.
Configure MSP360 Backup for Microsoft Azure
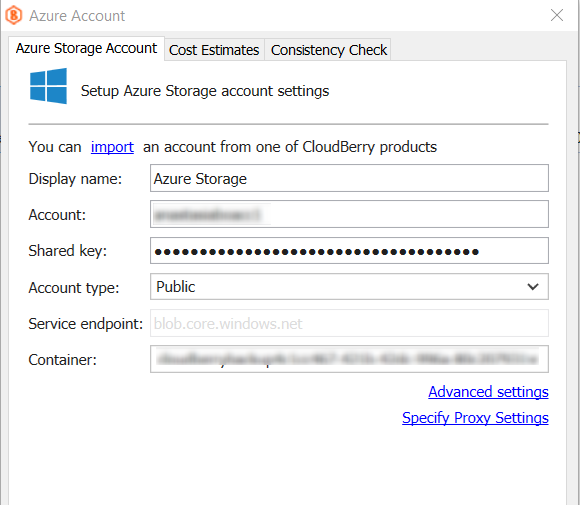
- Launch MSP360 Backup, click on the Menu Icon in the upper-left corner and click Add New Account.
- In the "Select Cloud Storage" screen, click the Azure icon.
- Enter the account's display name, access key (Account), secret key (Shared Key), select the account type and the required container.
Note: To find your Azure Access Keys, please refer to the “Retrieving Access Keys” section of this help article.
- Once you have specified all the required information, click OK. You will see your new Microsoft Azure account displayed in the list of accounts.
How to Select Microsoft Azure Account in Backup Wizard
You can select or register a new Microsoft Azure account in Backup Wizard when creating a new backup plan.
Click the Files button to start Backup Wizard and select Azure as your storage destination from the list.

After your Microsoft Azure account is specified, click Next and follow the rest of the Backup Wizard steps to create and customize your backup plan. Now you are ready to use your Microsoft Azure account with MSP360 Backup.
Creating a File Backup Plan
Now that you've selected Azure as your storage destination, proceed to the next steps of the file backup wizard. In the Advanced step, you can choose the desired storage tier. MSP360 Backup supports Azure Hot, Cool, Cold, and Archive tiers.
With this flexibility, you can find the storage tier that provides the best balance between cost and performance. The following options are available:
- Hot: For frequently accessed data. Highest storage cost, lowest access cost.
- Cool: For infrequently accessed data (min. 30 days). Lower storage, higher access cost.
- Cold: For rarely accessed data (min. 90 days). Even lower storage cost, higher access cost.
- Archive: For long-term, rarely accessed data (min. 180 days). Lowest cost, with slower retrieval.
Please note that the Hot storage tier is selected by default.
On the next steps, you can configure a backup schedule that fits your IT routines.

Also, you can configure retention policy settings and specify how long you need to keep your file versions.

Configure MSP360 Managed Backup for Microsoft Azure
To add Microsoft Azure as a storage destination in MSP360 Managed Backup, navigate to the Backup tab, Storage Accounts section in the upper navigation. Click Add Account and select Microsoft Azure from the list.

On the next step, you need to specify your account name and shared key. Please note that on this step you can also select account type:
- Public: Standard Microsoft Azure account.
- Government: For U.S. government agencies and partners.
- Germany: Data stored only in Germany, managed by a local trustee to meet EU regulations.
- China: Operates under Chinese regulations, available only within China.
- Azure Stack: Run Azure services locally in your own datacenter.
Then, follow the wizard to complete adding your new storage account.

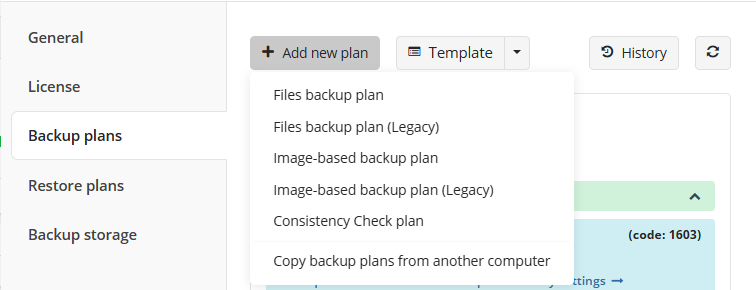
Creating a backup plan with Azure is straightforward: find the desired endpoint in your list of computers, click the three-dot icon in the Actions section on the right, and select Show Plans. In the slide-in panel that appears, click Add New Plan and choose the backup plan type you need from the list.
Configuring Microsoft Azure Lifecycle Policies
Azure lifecycle management provides rule-based policies that help optimize costs and performance by automatically transitioning data between access tiers or deleting it when it’s no longer needed.
With lifecycle management, you can:
- Move data between tiers (e.g., hot to cool or archive)
- Automatically delete expired backup data
- Set daily rules at the storage account level
- Apply rules to specific containers or blobs using prefixes
Azure storage offers different access tiers so that you can store your blob data in the most cost-effective manner based on how it is being used. MSP360 Managed Backup also supports Azure Hot, Cool, Cold, and Archive tiers.
For more information on Microsoft Azure storage tiers, refer to the Microsoft documentation page.
A lifecycle policy allows you to move backed up data between storage tiers after a specified period. For example, data can start in the Hot tier, move to Cool after 30 days, and then to Archive after 60 days. You can save this lifecycle setup and apply it as a default for other backup plans.
To configure the lifecycle policy, navigate to the Backup tab, Storage Accounts section in the upper navigation. Find the Azure account in the list, click the gear icon on the right and select Lifecycle Rules Settings.
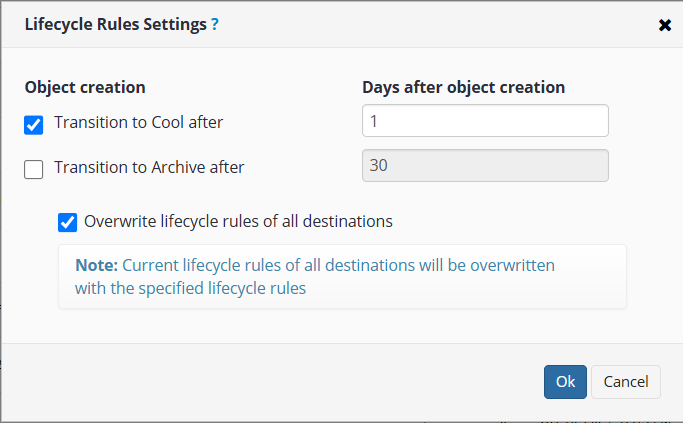
Please note that you need an administrator account based on Microsoft Entra ID principal user name to configure an Azure lifecycle policy. The Microsoft Entra ID account should have the Owner or Contributor role for Azure subscription as described in Prepare to Use Azure Lifecycle Policy article. Attempts to use another account will result in an error.
Conclusion
Getting started with MSP360 Backup and Azure is quick and straightforward. By following a few simple steps, you can securely back up your data to Azure's cloud storage with flexible tier options to match your needs. Start protecting your data today with a reliable, scalable solution.


