MSP360 Products
Remote Monitoring and Management in MSP360 Managed Backup
In the MSP360 Managed Backup, you can manage all aspects of backup and recovery plans from a single pane of glass. In this guide, we will overview the MSP360 Remote Management functionality.
Remote Management (Computers tab)
The Computers tab is the heart of the MSP360 web console. Here you can see all the computers under your management, check machine status, check the status of your existing backup plans, modify or delete them, set up new ones, perform bulk actions on multiple devices, track computer performance, connect to devices remotely, and more. Basically, the Computers tab allows you to manage all aspects of your IT infrastructure within a single dashboard.
There are three ways to open the backup and recovery plan slide-in:
- Click the name of the endpoint;
- Click on the backup status bar or the cloud icon near it;
- Click on the three dots and then on “Show plans”.

In the displayed slide-in, you can create a backup or recovery plan, or perform a consistency check. You can also start, stop, edit or delete any backup or recovery plan.
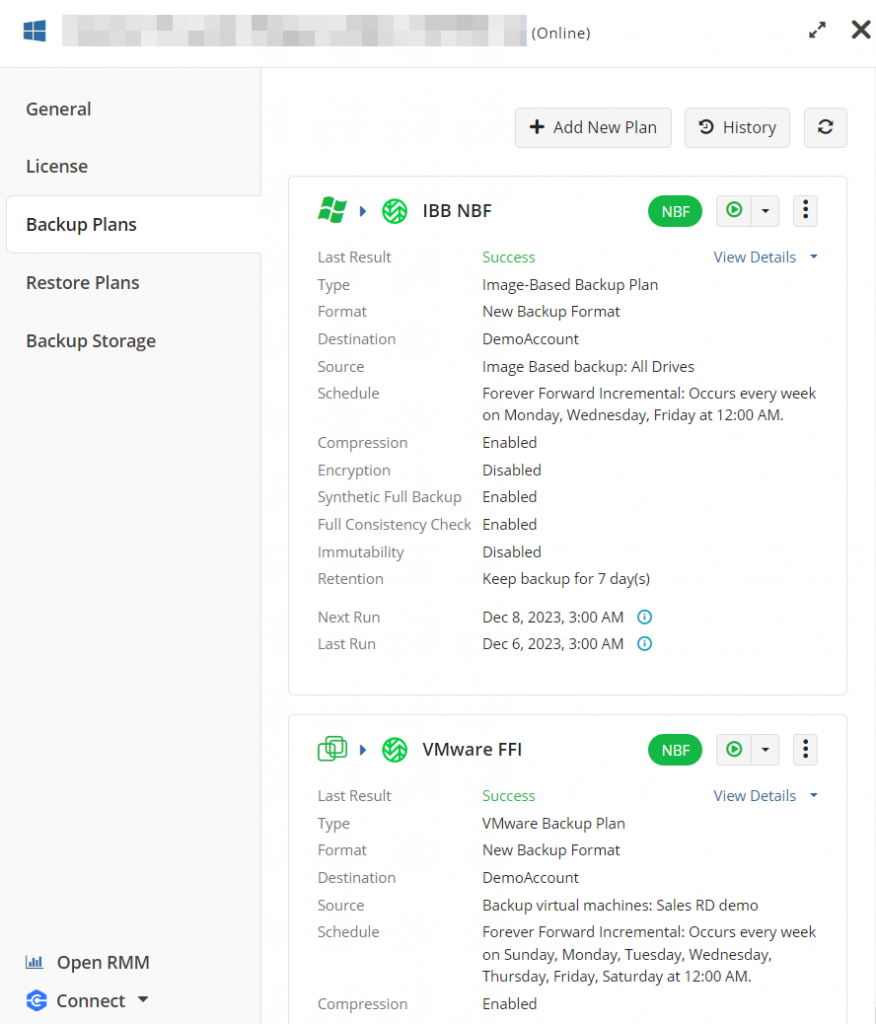
You can also change the user for the given endpoint and change the edition of the software that is applied to the endpoint. Remember that if you change the user for the endpoint, you will then need to re-upload all backup data.
You can delete or hide a computer if you need by clicking the three dots.
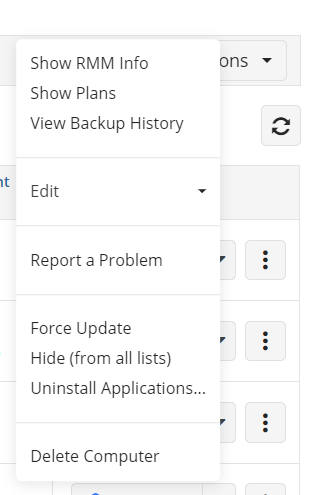
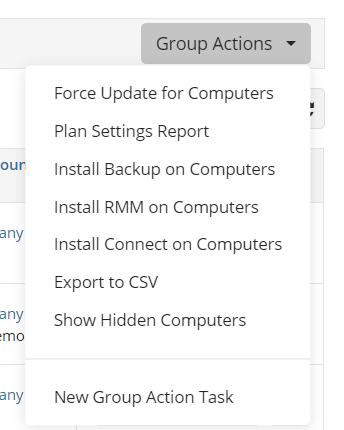
You can see all hidden machines by clicking the “Group actions” button in the upper-right corner of the screen.
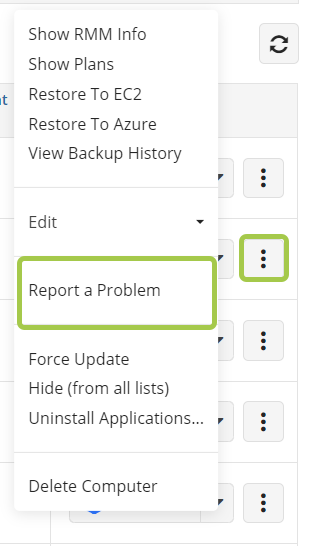
You can also force an update of any endpoint to the latest build of the MSP360 Backup software. Click the three dots in front of a required computer and then click ”Force Update”.
If you want to force-update all the endpoints you are managing, click the “Group Actions” button, followed by the option ”Force Update for Computers”.

If you encounter any issues with a backup or recovery process and you want to contact our support team, the best way to do this is to click the three dots and then report a problem. There, you can specify where you want to send logs, either to MSP360 support or to a custom email address. In most cases, our support team will ask you for the logs to check the issue in depth, which is why we strongly recommend you to send the ticket with the logs and a description of the issue as the first point of contact with our support team.
Remote Access
MSP360 console has a built-in remote desktop solution called MSP360 Managed Connect, which allows you to access clients' endpoints remotely. MSP360 Managed Connect has all the necessary features for efficient remote connections – file transfer, text and voice chat, session recording, multi-monitor support and more.
An MSP360 Managed Connect license and remote access enabled in your settings are required. To allow remote access, you should first go to the Settings tab, Global agent options, Connect section and allow remote access.

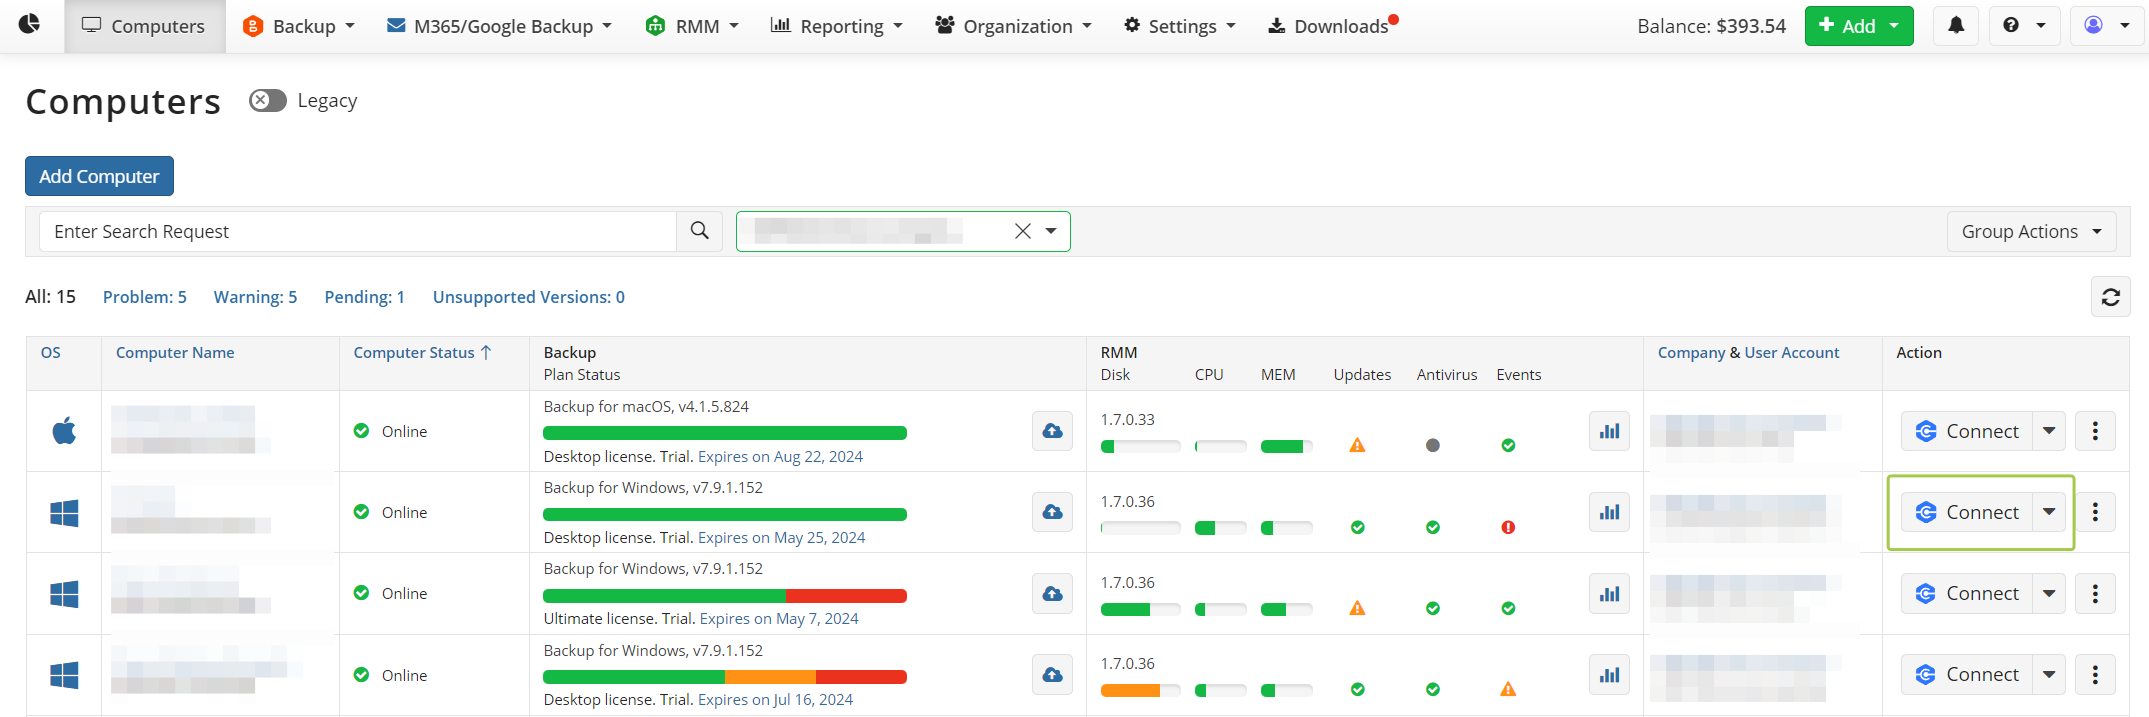
After that, click on the Connect icon next to the computer you want to connect to, and the connection will be established.
Further reading Getting Started with MSP360 Managed Connect
Remote Monitoring and Management (RMM)
Next comes MSP360 RMM, with which you can monitor and manage devices remotely. Click on the diagram icon in the RMM section, and a slide-in will open.
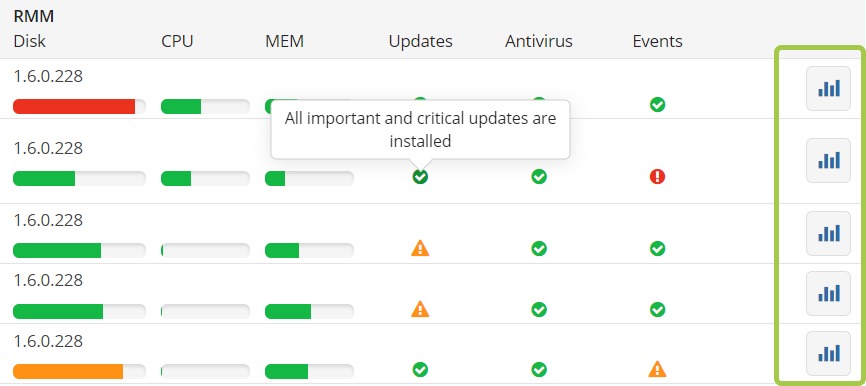
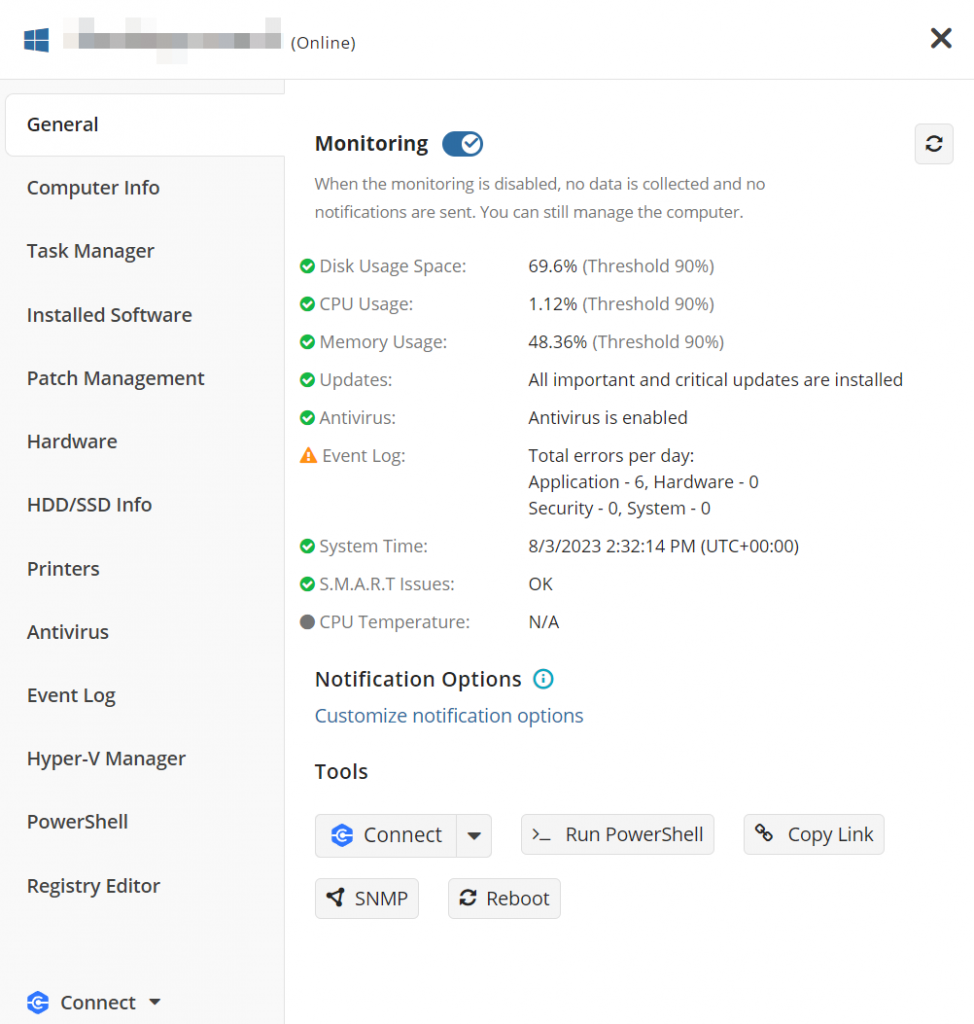
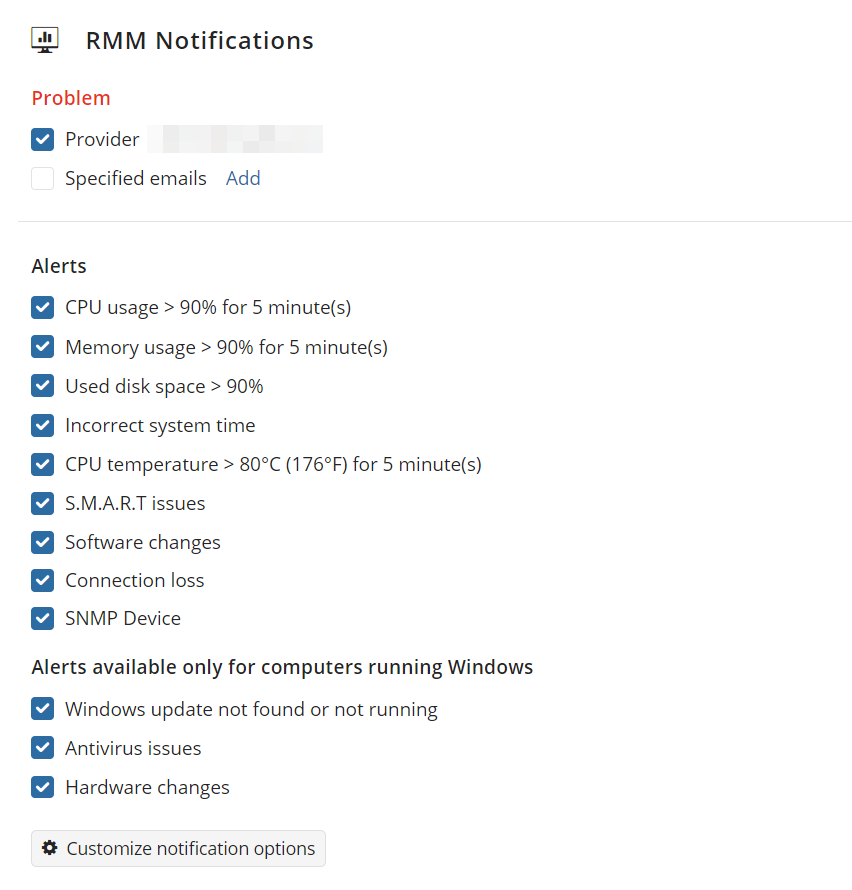
With MSP360 RMM, you can track device info and performance metrics (details of computers' hardware, operating system, CPU and memory usage, free disk space, etc.), run system updates, install/uninstall apps, perform bulk actions on multiple devices, schedule tasks, execute PowerShell commands, manage antivirus, set up alerts, and more. An MSP360 RMM license is required to take advantage of RMM features.
Further reading Getting Started with MSP360 RMM
Monitoring/History
In the Monitoring/History section, you can see the status of all backup and recovery plans and their schedules. To open the detailed results, you can click on the last run or last success, or click the gear button, followed by “Show Last Plan”.
In the displayed slide-in, you can see the details of the given run. You can also click on the “Detailed Report” button to check all files that were or were not backed up.
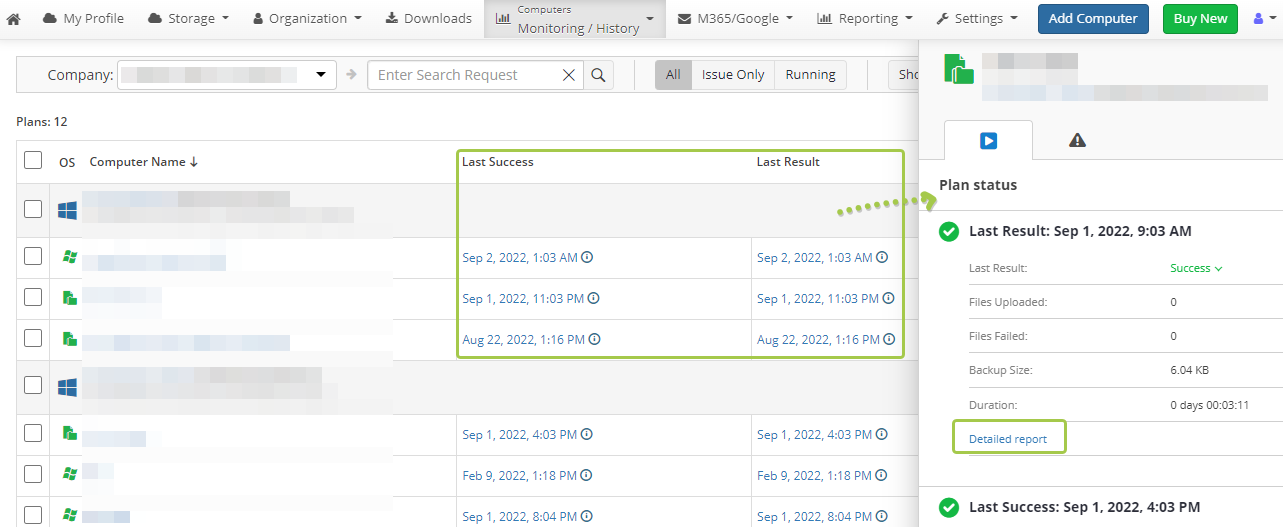
Click the “History” button in the upper-right corner of the slide-in to check the status of all backup and recovery plans for the specified user.
Restore to Cloud
MSP360 Managed Backup allows you to recover any image-based or virtual-machine backup as a cloud virtual machine in Amazon EC2 and Microsoft Azure VM.

Note that to enable “Restore to Cloud” functionality, you should contact our support team.
Learn more about this feature in our web help, in the Backup and Restore section.
EC2 Snapshot Management
The Amazon EC2 snapshot management feature allows you to perform a cloud-to-cloud backup of Amazon EC2 instances to Amazon S3.
That’s it. If you have any questions about MSP360 Managed Backup Remote Management, feel free to contact our pre-sales team.
