Getting Started with MSP360 Tickets
MSP360 Tickets is a ticketing system built into the MSP360 Management Console. It lets you track support issues across your customers' devices, either by opening tickets yourself or by having Backup and RMM incidents open them automatically.
This guide covers what you need to start, how to create and work with tickets, how to turn incidents into tickets without manual entry, and how to give end users access to their own tickets.
Before you start with MSP360 Tickets
MSP360 Tickets is part of the MSP360 Management Console, so there is nothing separate to install. To use it:
- Sign in to the MSP360 Management Console with an administrator account.
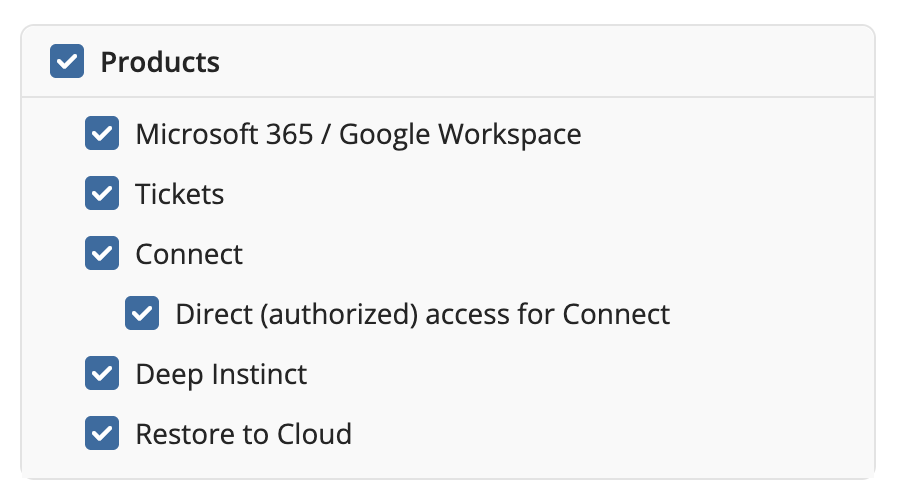
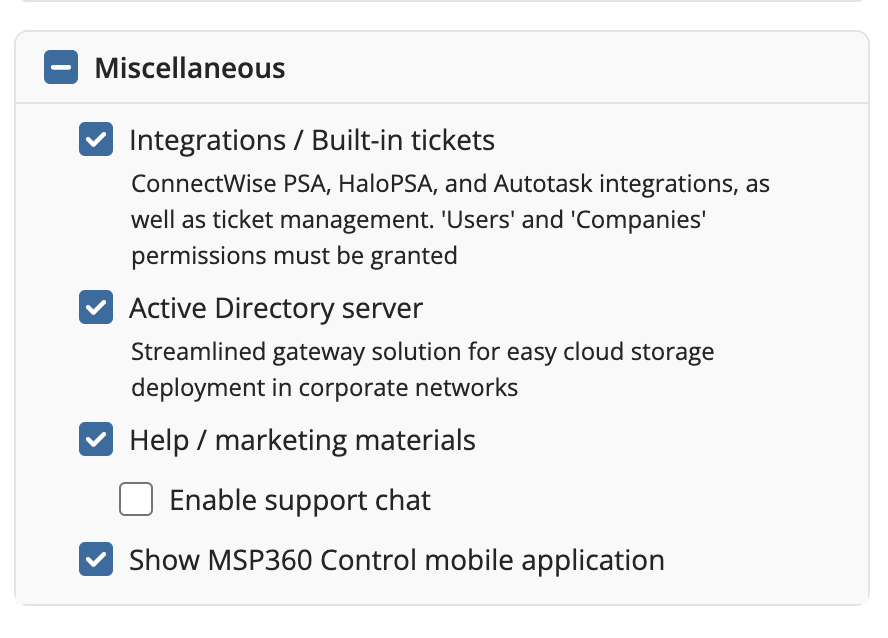
- Make sure the Tickets module is available in your Management Console.
- Go to administrator permissions and verify that the required Tickets permissions are enabled for the users who will work with tickets (Organization > Administrators).
How to create a ticket automatically from Backup or RMM alerts
Backup incidents such as failed plans and missed schedules, and RMM incidents such as CPU, memory, disk, service status, and agent-offline conditions, can each map to a ticket tagged to the affected device.
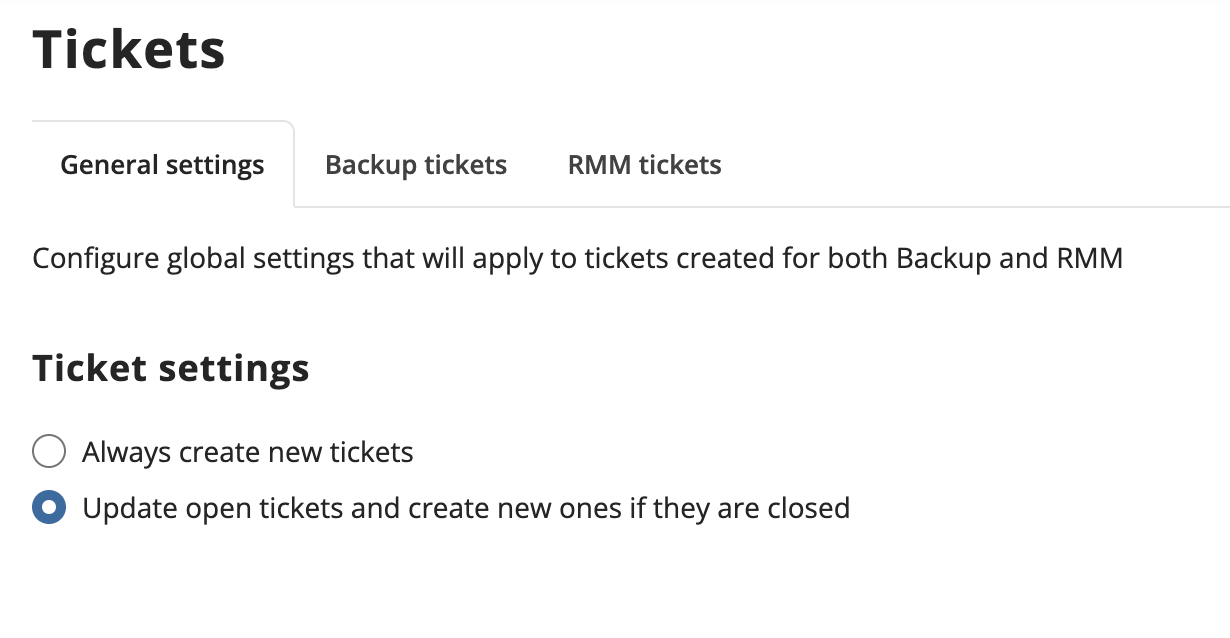
To set this up, go to Settings > Tickets > General settings, where you control how each incident becomes a ticket:
- Always create new tickets. Every incident opens its own ticket. Use this when you want independent tracking of each event.
- Update open tickets and create new ones if they are closed. Subsequent incidents on the same device update the open ticket instead of creating new ones, and a new ticket opens only after the previous issue is closed. Use this to cut noise from recurring alerts.
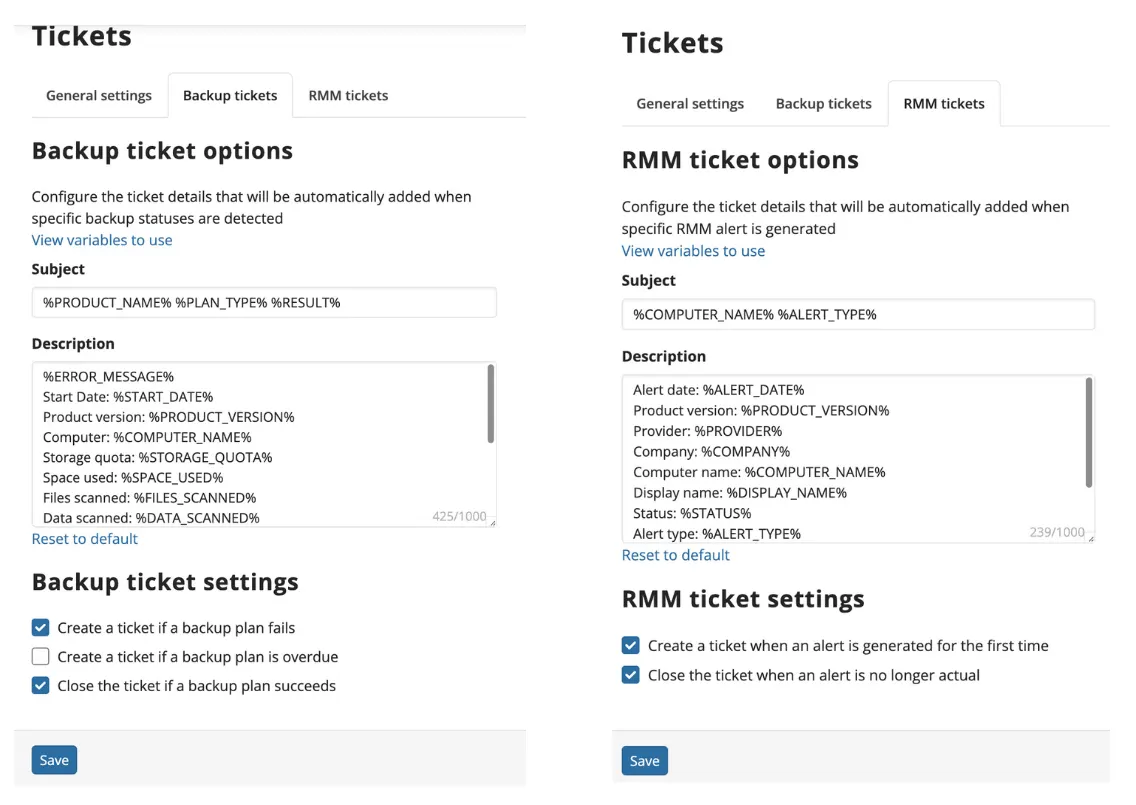
You decide what an auto-generated ticket contains.
The template editor uses dynamic variables, so each ticket can carry the device name, the plan or alert name, the alert type, the timestamp, and other context your team needs to triage. Backup and RMM templates are configured separately.
How to manually create a ticket
- Open Backup > Tickets or RMM > Tickets.
- Click the + button.
- Select the affected computer.
- Enter a title and a description of the issue.
- Choose an assignee.
- Save.
The ticket appears in the queue with the status Open, linked to the company the device belongs to. Use manual tickets for customer service requests, planned maintenance, internal IT work, or anything else worth tracking.
Working with tickets
Every ticket moves through Open, In progress, Pending, and Closed. Update the status as the work progresses so the queue reflects reality. Assign each ticket to a technician, and let people work from the "Assigned to me" view, which gives each person their own queue.
Each ticket has a conversation thread for administrators. Opening a ticket shows the device's system information alongside the thread, so you can triage without leaving the ticket. Document what you tried, ask questions, and leave handoff notes inside the ticket. Unread comments show on the main dashboard, so updates do not get missed.
Filter the queue by company, computer, assignee, or status, and search titles and descriptions to find a specific ticket. Only the administrator who created a ticket can edit it; closed tickets cannot be edited or deleted, and deleting an open ticket is permanent. Because tickets are tied to the device rather than a session, they stay visible and editable even when an endpoint is offline, with the context ready when it reconnects.
End-user access to Tickets
End users submit and can track their own tickets, admins message them inside the ticket, and internal admin discussion stays private with a "Send for admins only" option.
To set this up:
- In Settings > Online Access, turn on online access and make sure "Users can view and manage tickets" is enabled.
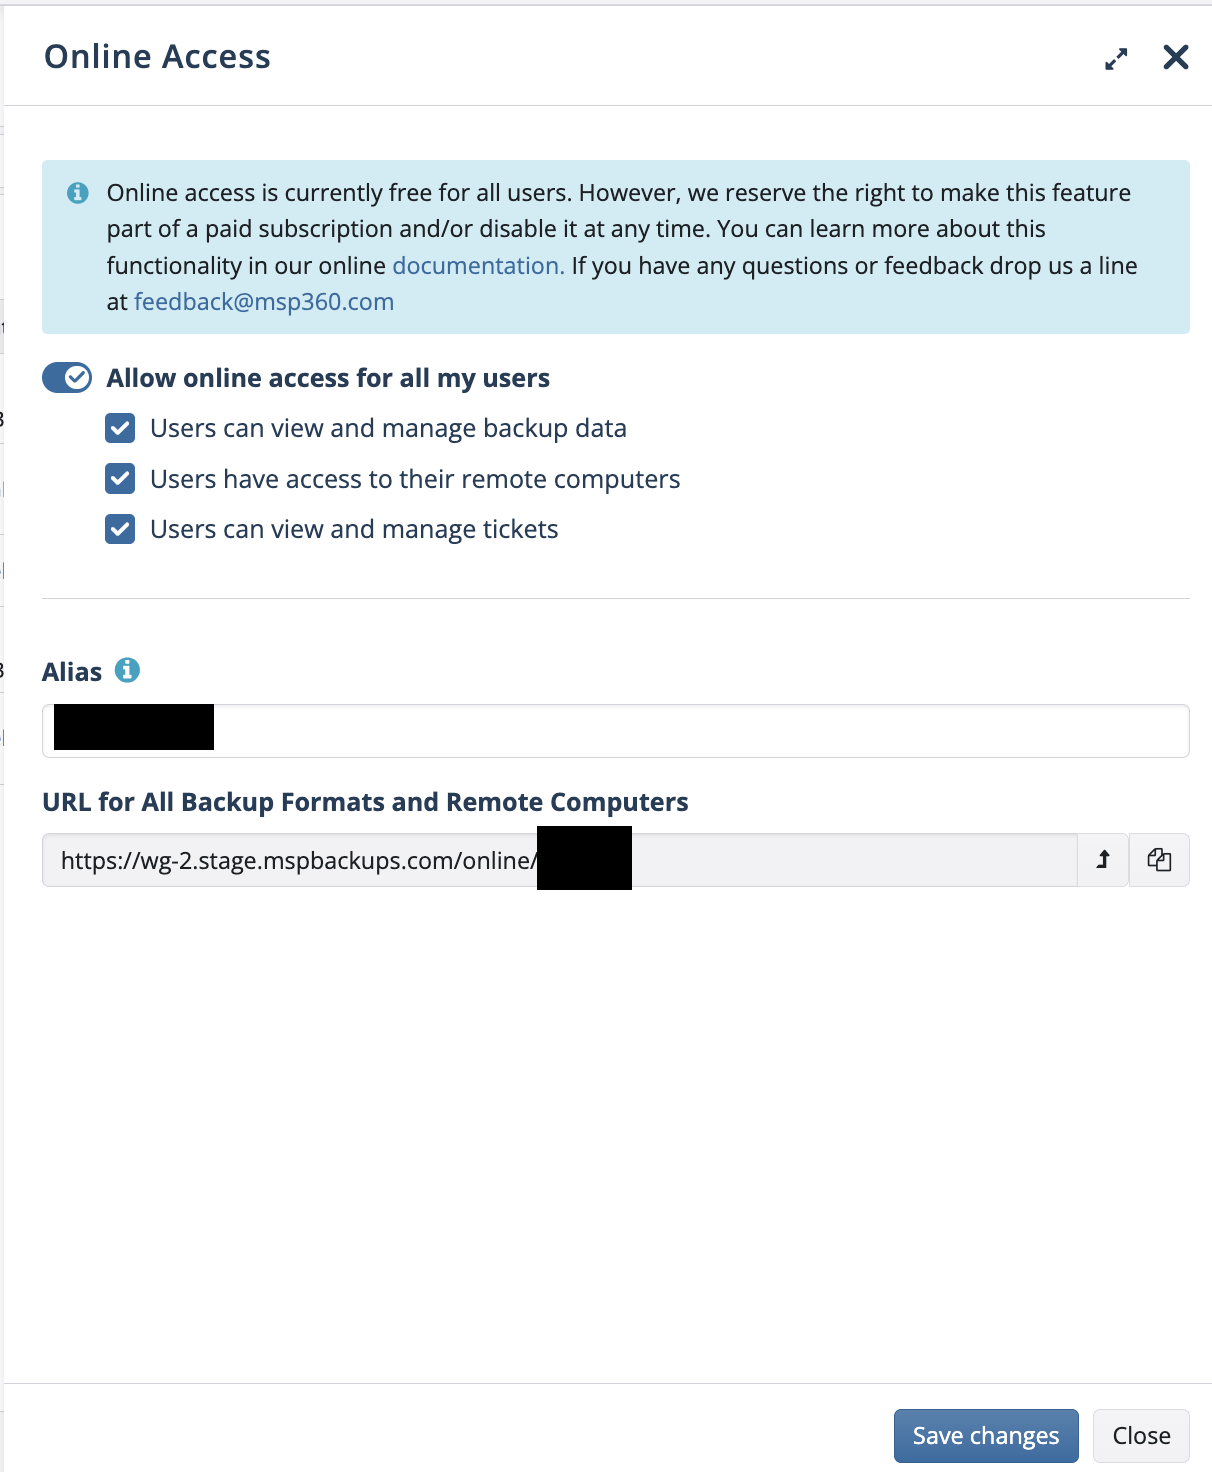
In Online Access, enable "Users can view and manage tickets".
- Go to Organization > Users and add a new user (the end user who will use this feature).
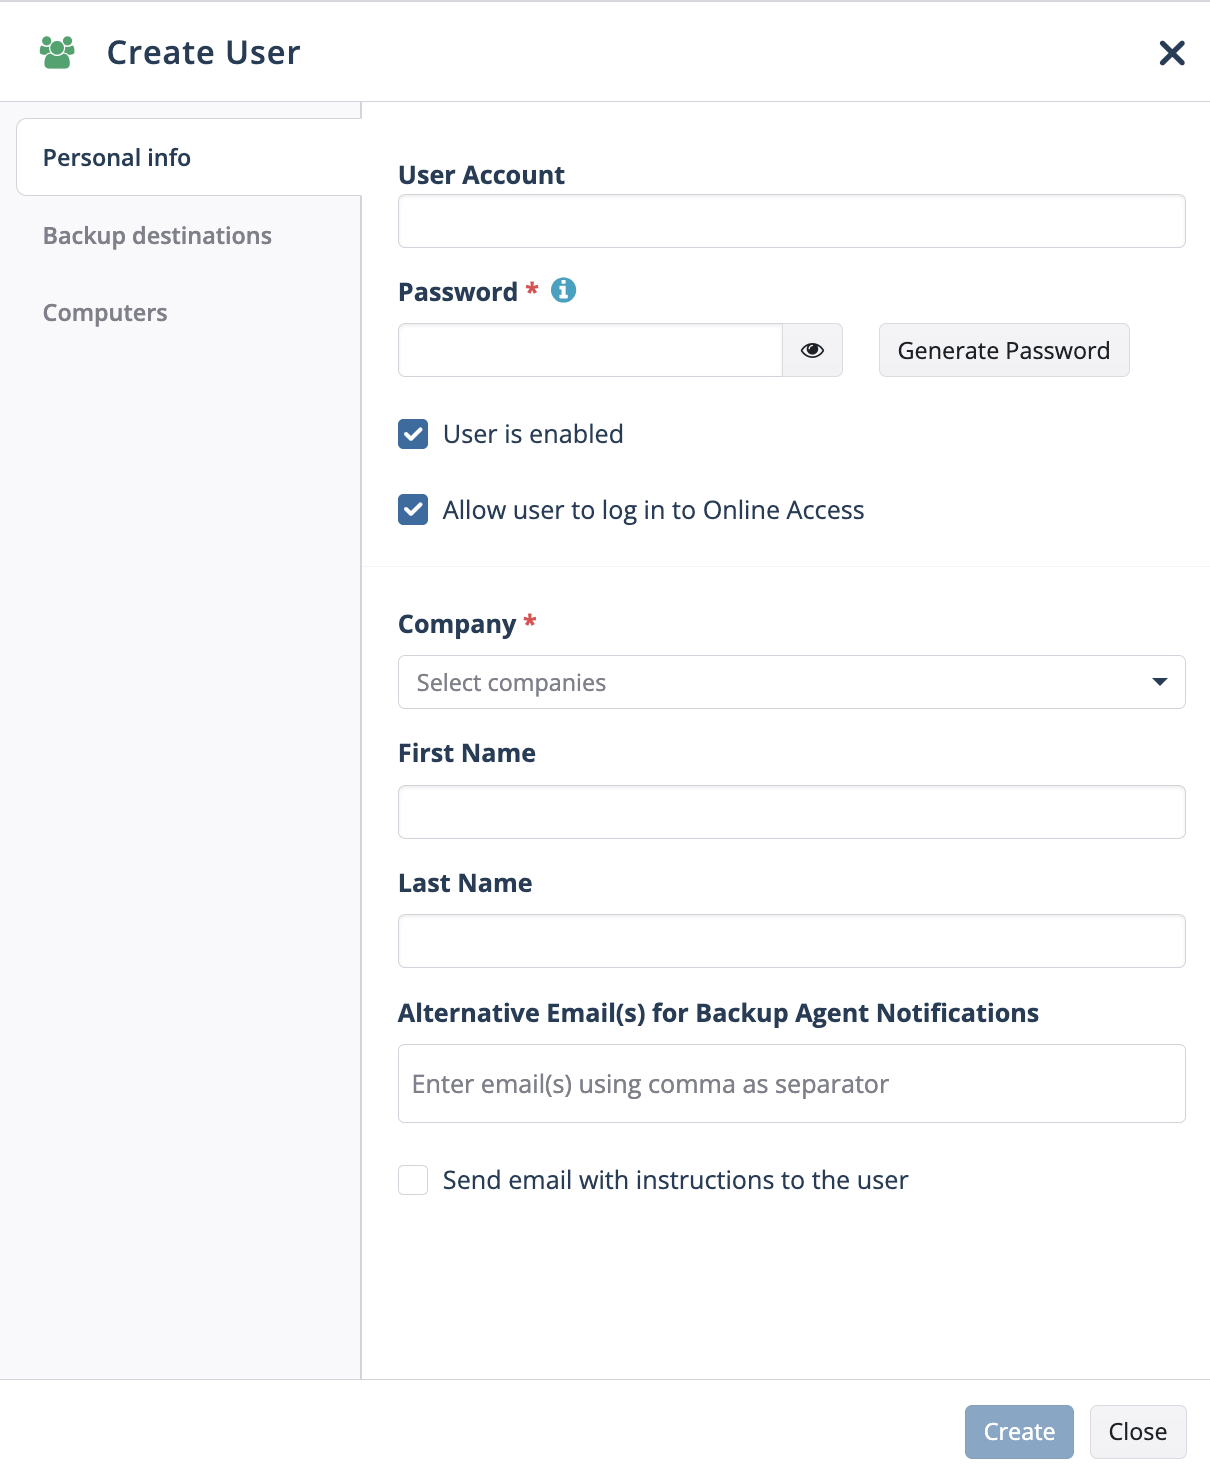
When creating the user, turn on "Allow user to log in to Online Access".
- After the end user logs in, they can create tickets for administrators and follow the conversation through comments.
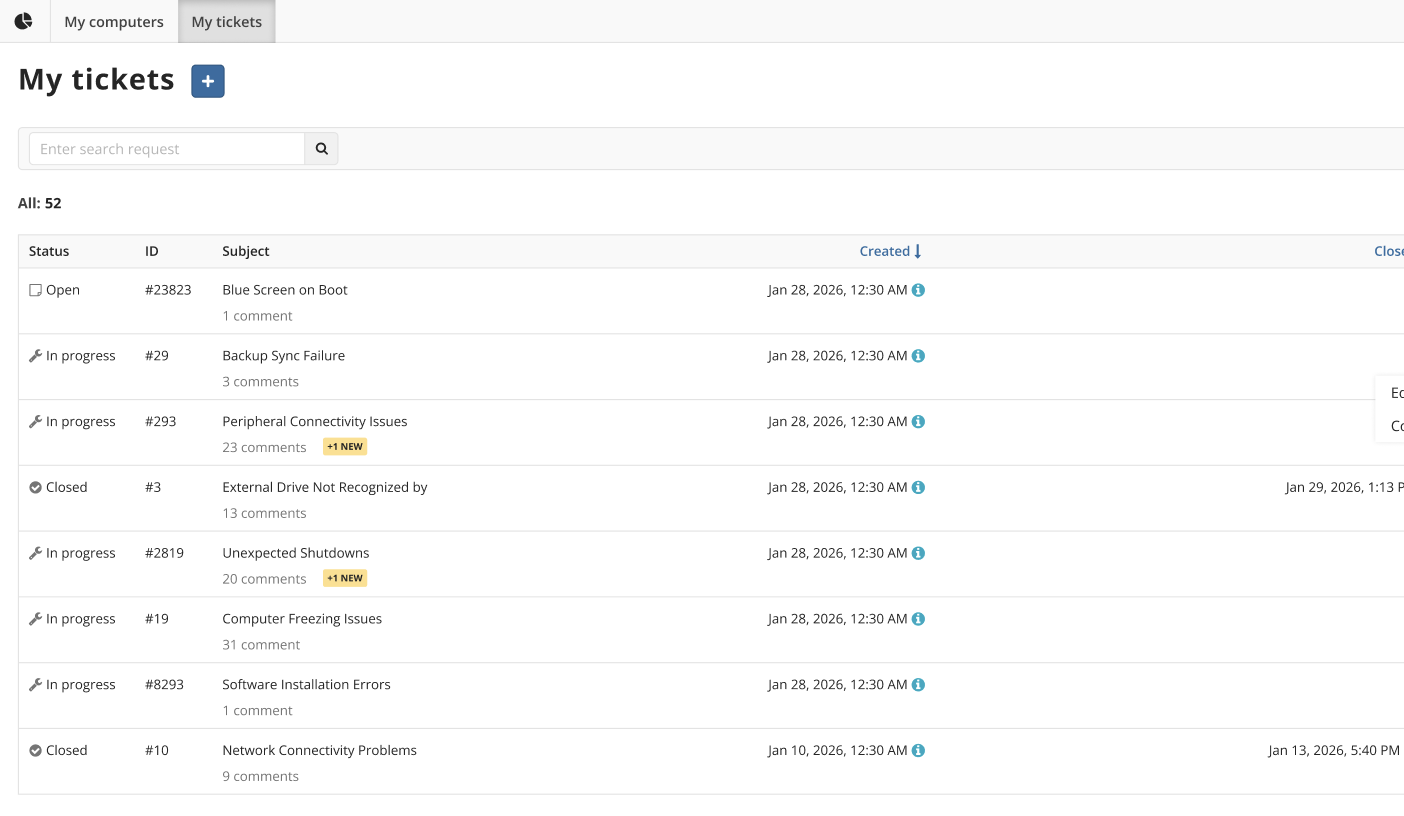
The end user’s My tickets view: + opens a new ticket, and comments hold the conversation.
Coming soon
The following are on the roadmap and not yet available:
- Ticket priorities: Low, Medium, High, and Critical, for triage by urgency alongside status and assignee.
- Change history: a record of every update made to a ticket over time.
- Attachments and notifications.
Share your feedback for MSP360 Tickets
We built MSP360 Tickets around your requests, and we’ll keep shaping the roadmap the same way. We encourage you to share your feedback and feature requests on our feedback board.