MSP360 Products
SQL Server Backup in MSP360 Managed Backup Service
Introduction
This article will guide you to through setting up Microsoft SQL Server backup, using the MSP360 Managed Backup. It covers all aspects of a database backup, including choice of storage, schedule, and retention policy.
Backing up Microsoft SQL Server with all its databases is a must for every organization that uses it and, therefore, is a part of an MSP’s daily work. This process is specific, because of the large amount of data and changes that are very frequent. Not only do you need to copy all this data, but you should also track all the modifications, to be able to recover everything to a certain point in time if this is needed. That is why it is highly recommended to combine several types of backup:
- do full backups regularly
- do differential backups more frequently
- back up transaction logs, to be able to restore everything if trouble occurs.
Full backups save all the data, differential ones upload changes, and transaction logs capture all the transactions that are being made.
Using MSP360 Managed Backup Service, you can back up your server with all the components of your databases. The solution is fully integrated with the mechanisms of Microsoft SQL Server to prevent data loss, as well as providing you with many features and great usability. To create a backup of your server from your MSP360 Managed Backup Service console, follow the instructions below.
1. Starting Backup Configuration
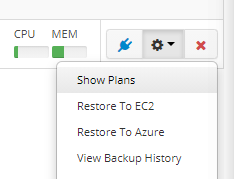
Enter your MSP360 Managed Backup Service console and proceed to the Remote Management tab. Click the gear icon near the server you want to back up and choose Show Plans from the drop-down menu.
Then, click the plus button and select MS SQL.

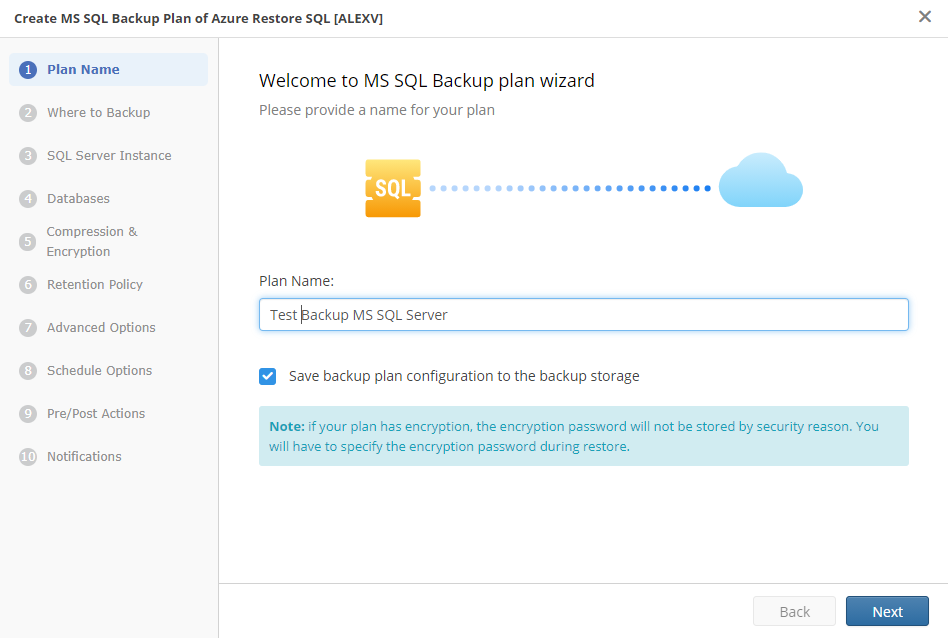
Give your plan a name.
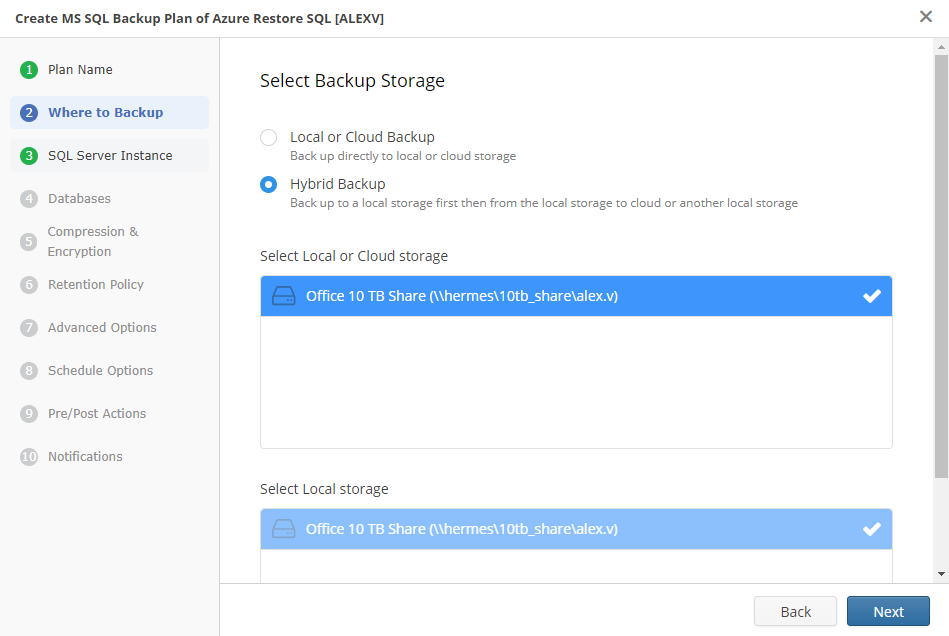
2. Select Storage
Define how you’re going to back up your data – to the local or cloud storage or two storages, local and local or cloud. The latter method is better for keeping your data safe according to the 3-2-1 rule.
Further reading The 3-2-1 Backup Rule: Extend Your Backup Security
3. Select SQL Server Instance
Select the required SQL Server instance and the authentication type. If you choose SQL, you’ll need to enter your username and password. Click the checkboxes to verify the permissions and/or use a secure connection if needed. 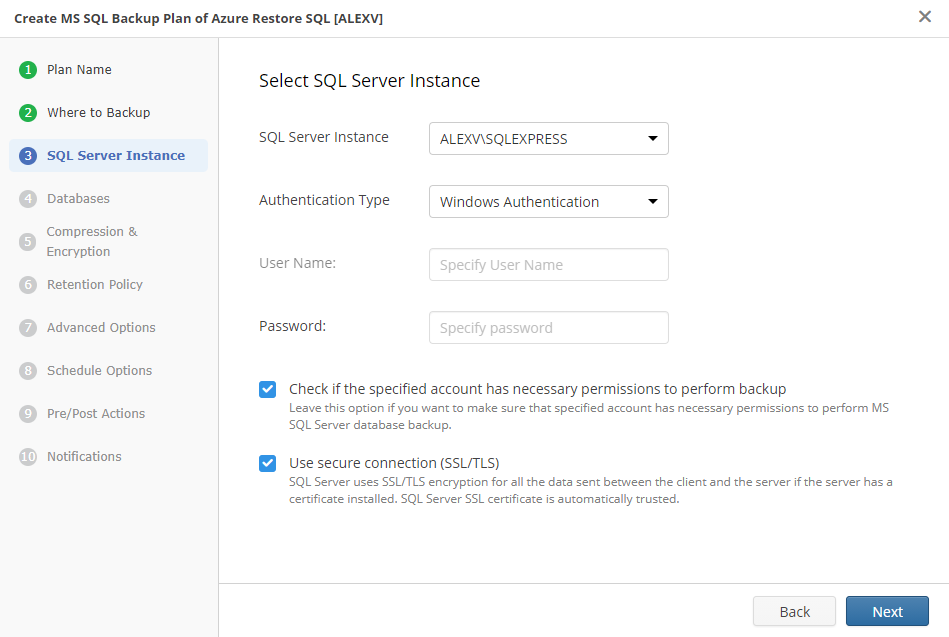
4. Select Databases to Back Up
Choose the databases you want to back up. 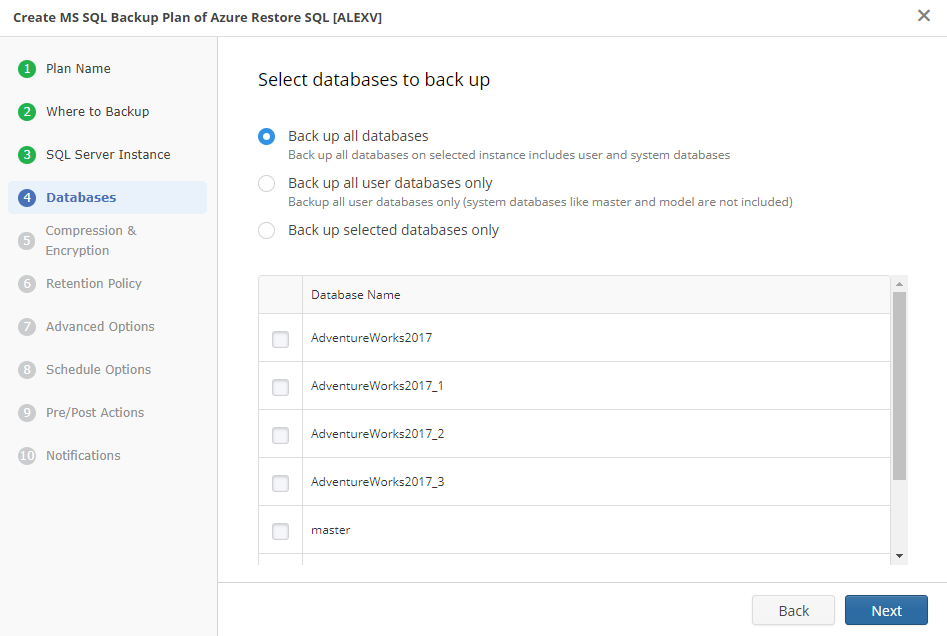
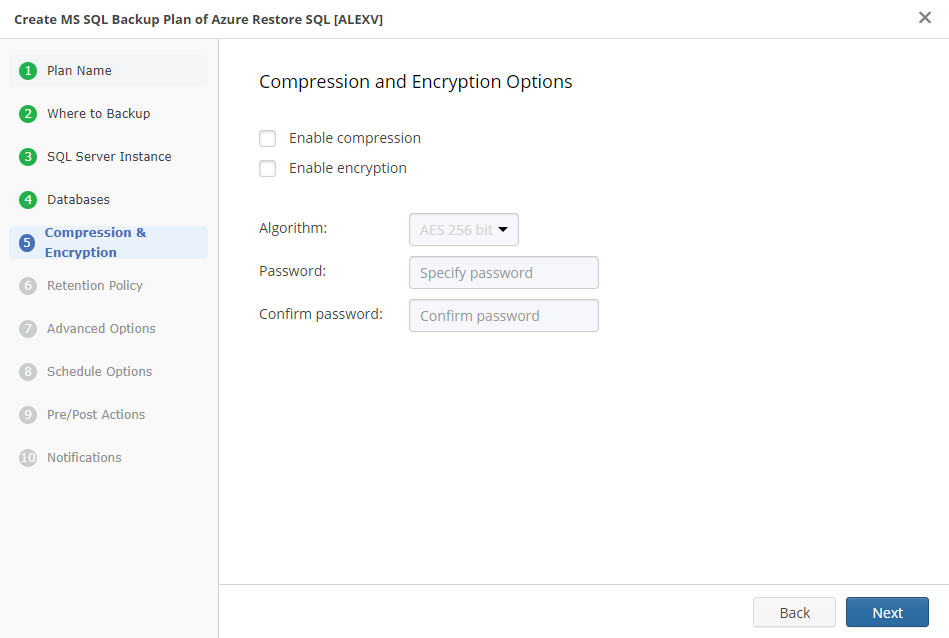
Enable compression if you need to occupy minimum space in the storage. Encryption provides you with an additional layer of data protection. Please note: if you forget the password, you won’t be able to recover your server.
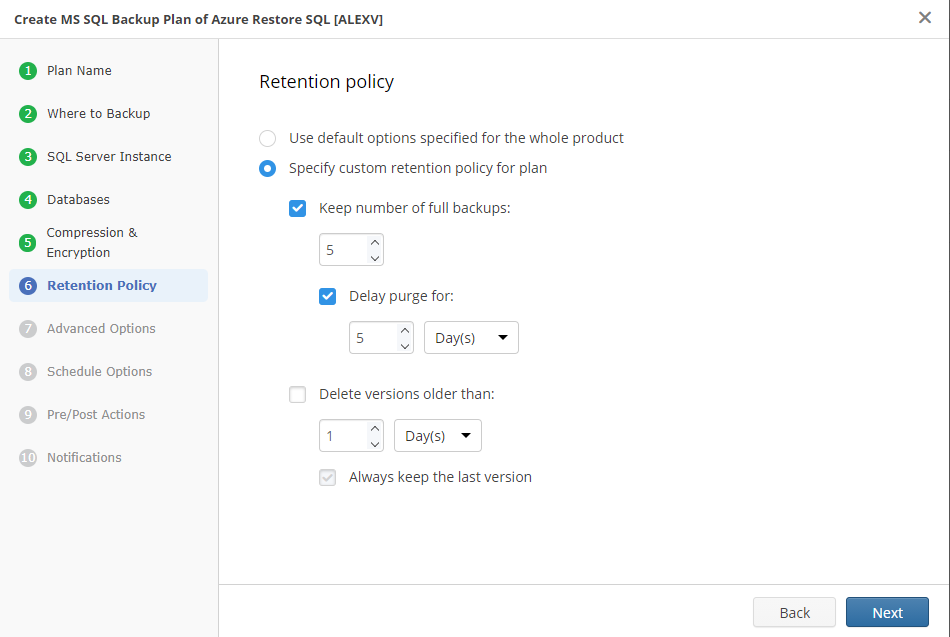
5. Specify Retention Policy
Next, specify the retention policy. You can use the default options (they are on your screen, greyed out) or set up your own. For example, you can:
- change the number of full backups you want to keep (along with differential and transaction log backups) or delay purge for more than three days (three is the default setting) so that you will have more time to check whether you need the backups that are going to be deleted.
- or delete versions (each version is full backup + differential + transaction log) that are outdated.
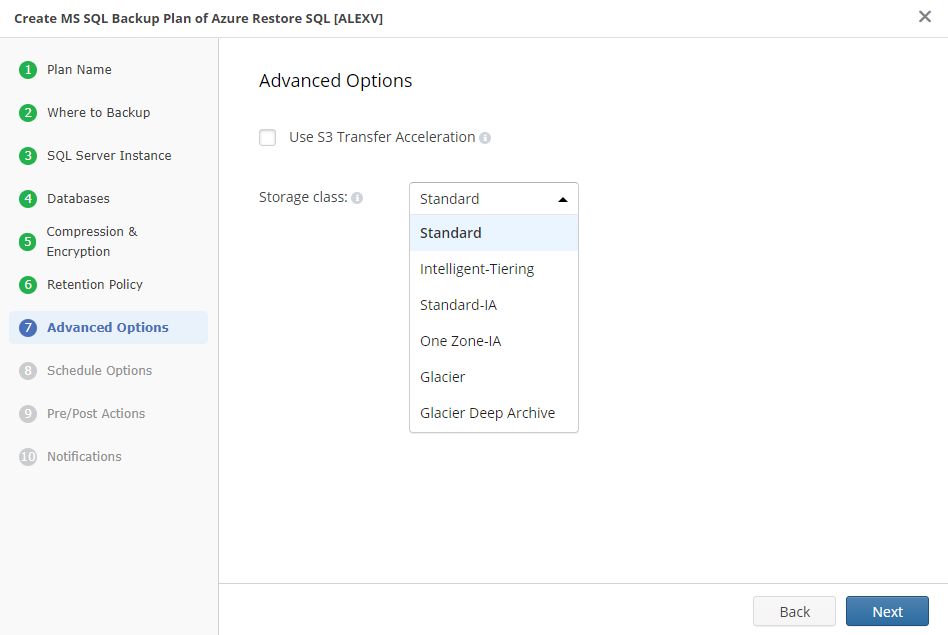
6. Define Advanced Storage Options
Define advanced storage options, if needed.
7. Define Backup Schedule
In the next step, define the schedule for your backup plan. Of course, you can run it manually or choose a specific date to launch the plan, but it is recommended that you choose a schedule according to your estimated RTO/RPO. Also, here you can tell the solution what to do if the plan runs for too long or if it was missed due to a computer being down. Additionally, the Alert plan as overdue after option allows you to receive a notification if the backup plan fails after the defined number of days.
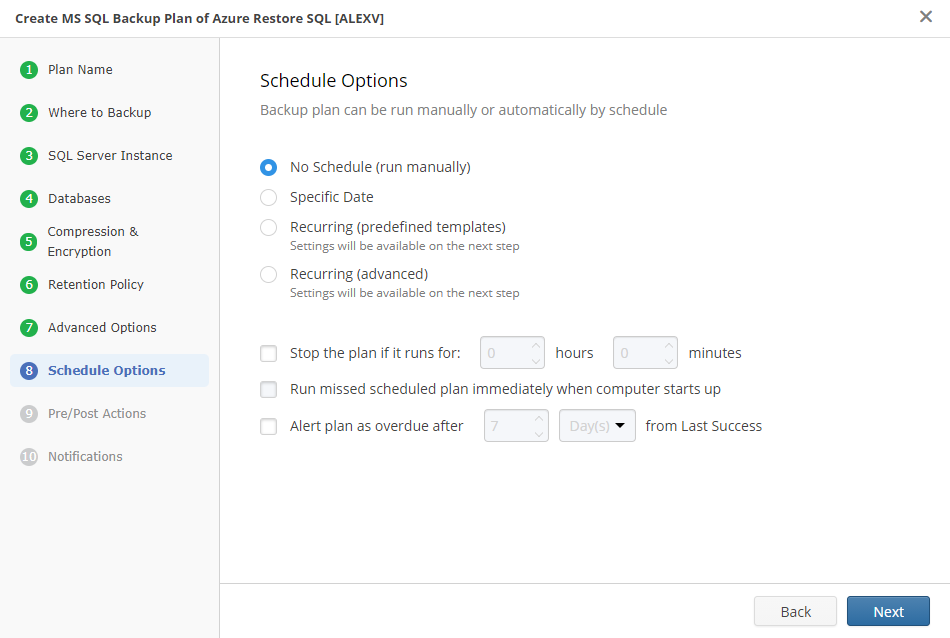
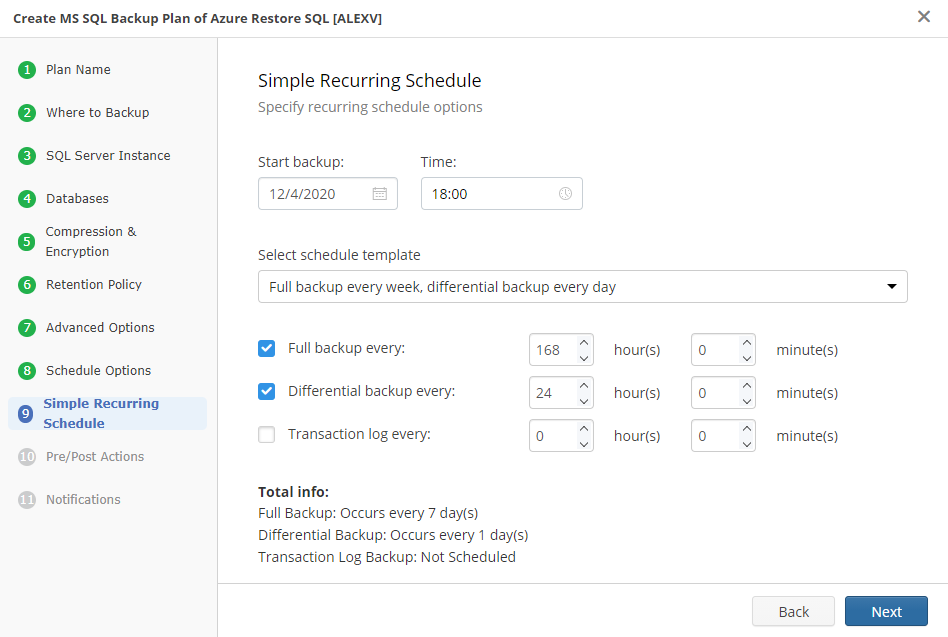
If you choose the Recurring (predefined templates) schedule, the solution will prompt you to select a template for running your plan.
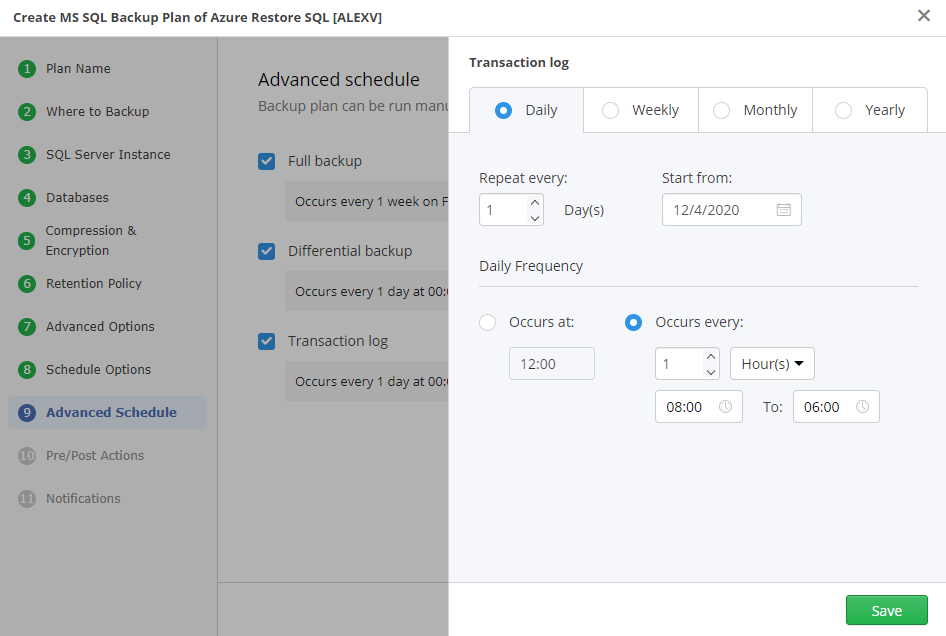
The Recurring (advanced) option is for those who prefer to customize everything manually. Here, you can set up the exact starting time for every component of your backup plan.
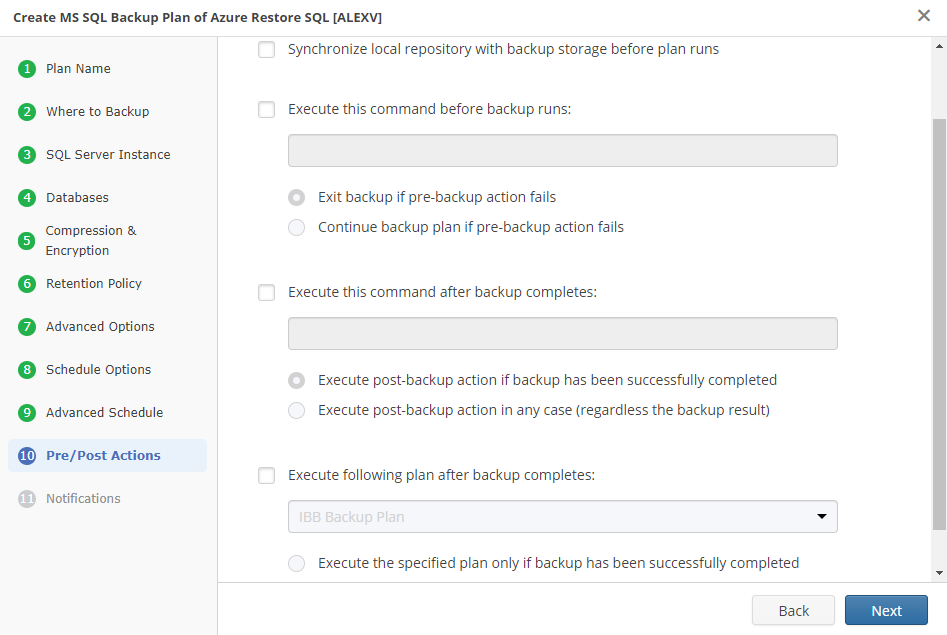
8. Define Actions Before and After Backup
The Pre / Post actions section allows synchronizing your local repository with backup storage before the plan runs. Additionally, you can set up what script to run before or after backing up your files or choose another plan to be launched after the current one.
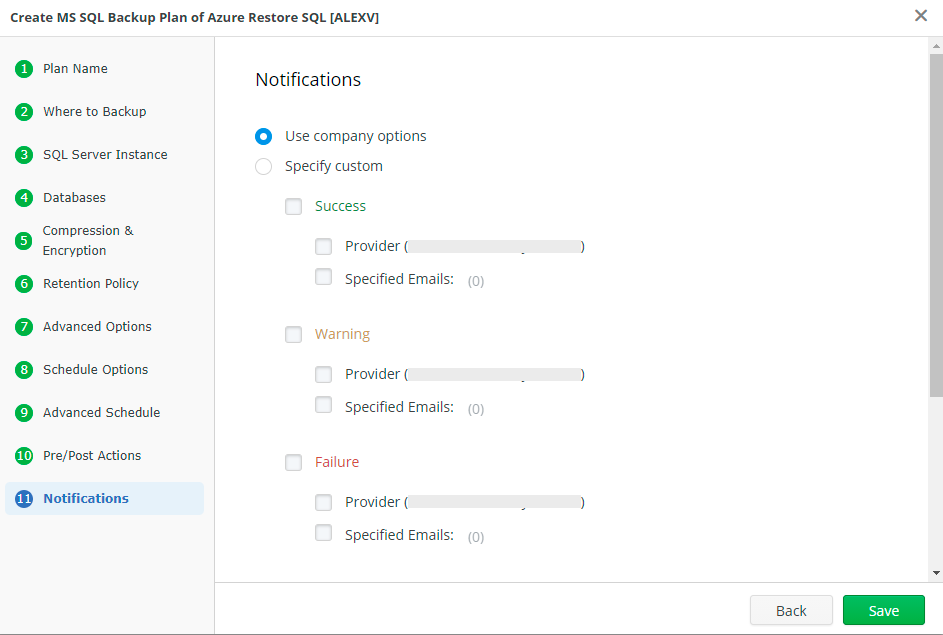
Finally, set up notifications if you want to get emails about the success, partial failure, or total failure of the backup plan.
Further reading Setting up notifications in Managed Backup Service.
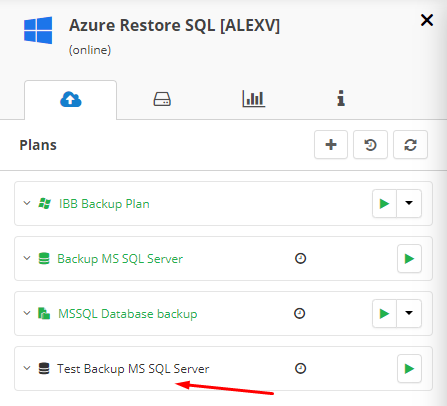
That’s it. The plan has appeared in your plans list.
Conclusion
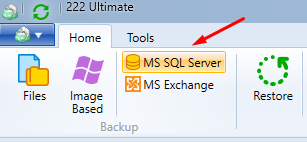
Now you know how to set up your Microsoft SQL Server backup plan in the MSP360 Managed Backup Server console. Another way to create a plan is to use the Managed Backup Server agent – just launch it on the required computer and click MS SQL Server to run the wizard. The settings are similar to those of the console version.
Backing up your Microsoft SQL Server regularly is very important. It allows you to prevent loss of your vital data and therefore, even if something happens to your server, you can restore it and quickly get back to your normal working schedule.