MSP360 Products
Retention Policies in MSP360 Managed Backup for Microsoft 365 and Google Workspace
Retention policies are a vital part of your backup strategy. This guide will explain the purpose of retention policies and provide a step-by-step walkthrough on how to create, assign, and manage them in MSP360 Managed Backup for Microsoft 365 and Google Workspace.
Value and Purpose of Retention Policies
Retention policies define how long data is retained and establish rules for its lifecycle, ensuring compliance, controlling storage costs, and protecting against data loss. As a managed service provider (MSPs) or an IT professional, understanding how to use retention policies will help you achieve your data protection goals with Microsoft 365 and Google Workspace.
A good retention policy brings the following qualities to a backup strategy:
- Safeguards Against Data Loss and Ensures Compliance: Data is retained long enough to protect against data loss and meet regulatory requirements, fulfilling the primary purpose of a backup.
- Optimizes Storage Usage: Unnecessary data is automatically removed once it is no longer needed, keeping storage consumption efficient and costs manageable.
- Aligns with Data Value: Retention rules match the nature and importance of the backed-up data, ensuring appropriate handling for each data type.
Further reading Understanding Retention Policies in MSP360 Managed Backup for servers and workstations
Creating a New Retention Policy
Why Create a Retention Policy?
By default, when you set up Microsoft 365 backup or Google Workspace backup, the service includes no retention policy. That is, backed up data is stored indefinitely. It’s the safest default option, but it assumes that you will set up a retention policy later on.
How to Create a Retention Policy
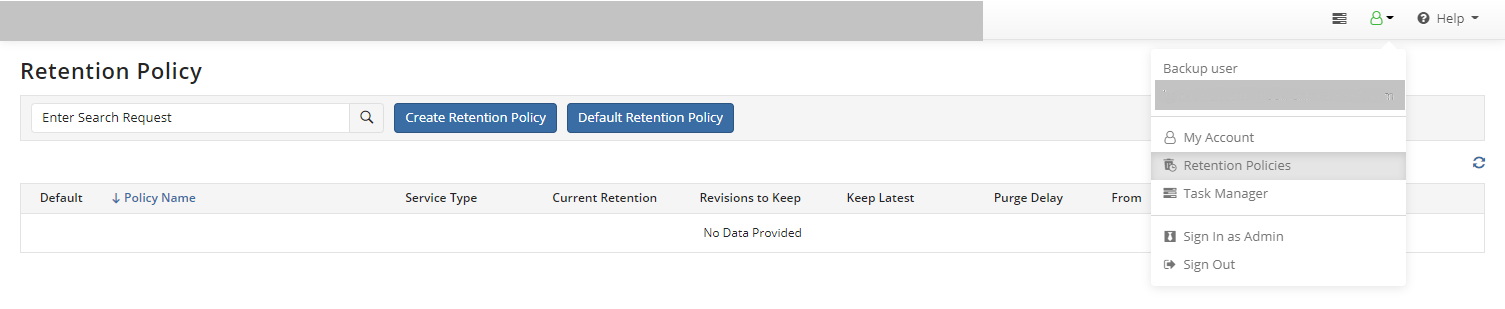
- Log in to the MSP360 Managed Backup Service Dashboard. Navigate to the Retention Policies screen from the Account menu:
- Click Create Retention Policy. A pop-up window will appear:
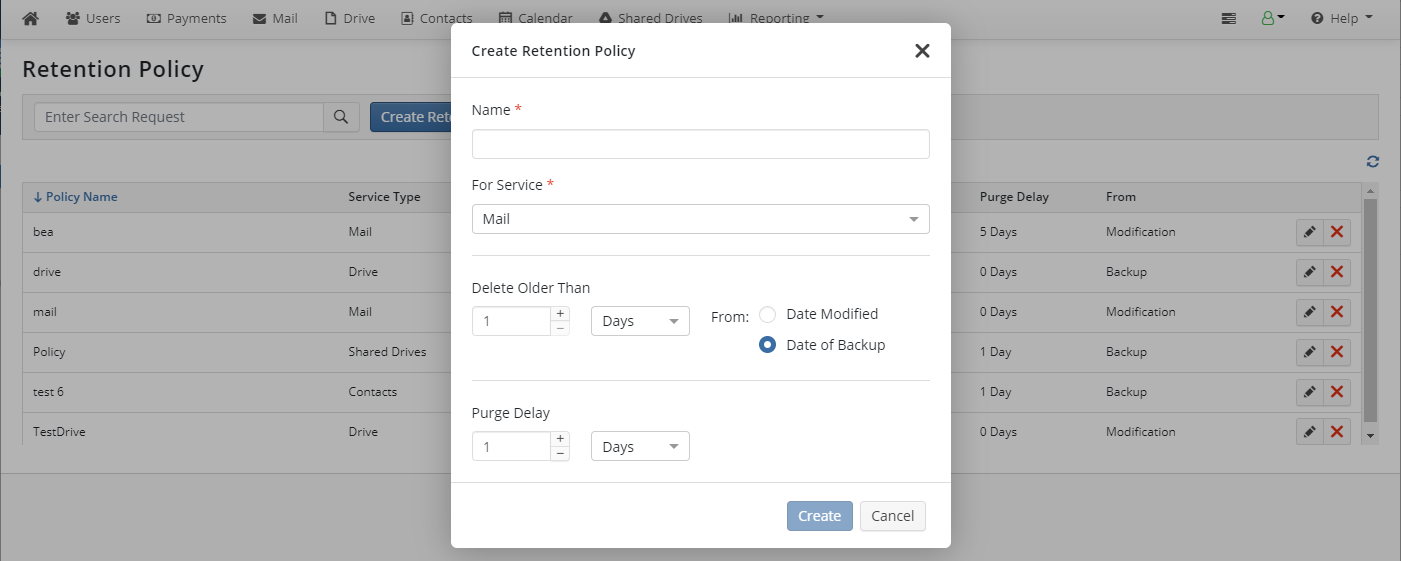
- Give the policy a descriptive name. It will be used when you assign this policy to a user.
- Select the service for which the policy will apply (e.g., Mail, Drive, Contacts, Calendar, etc.).
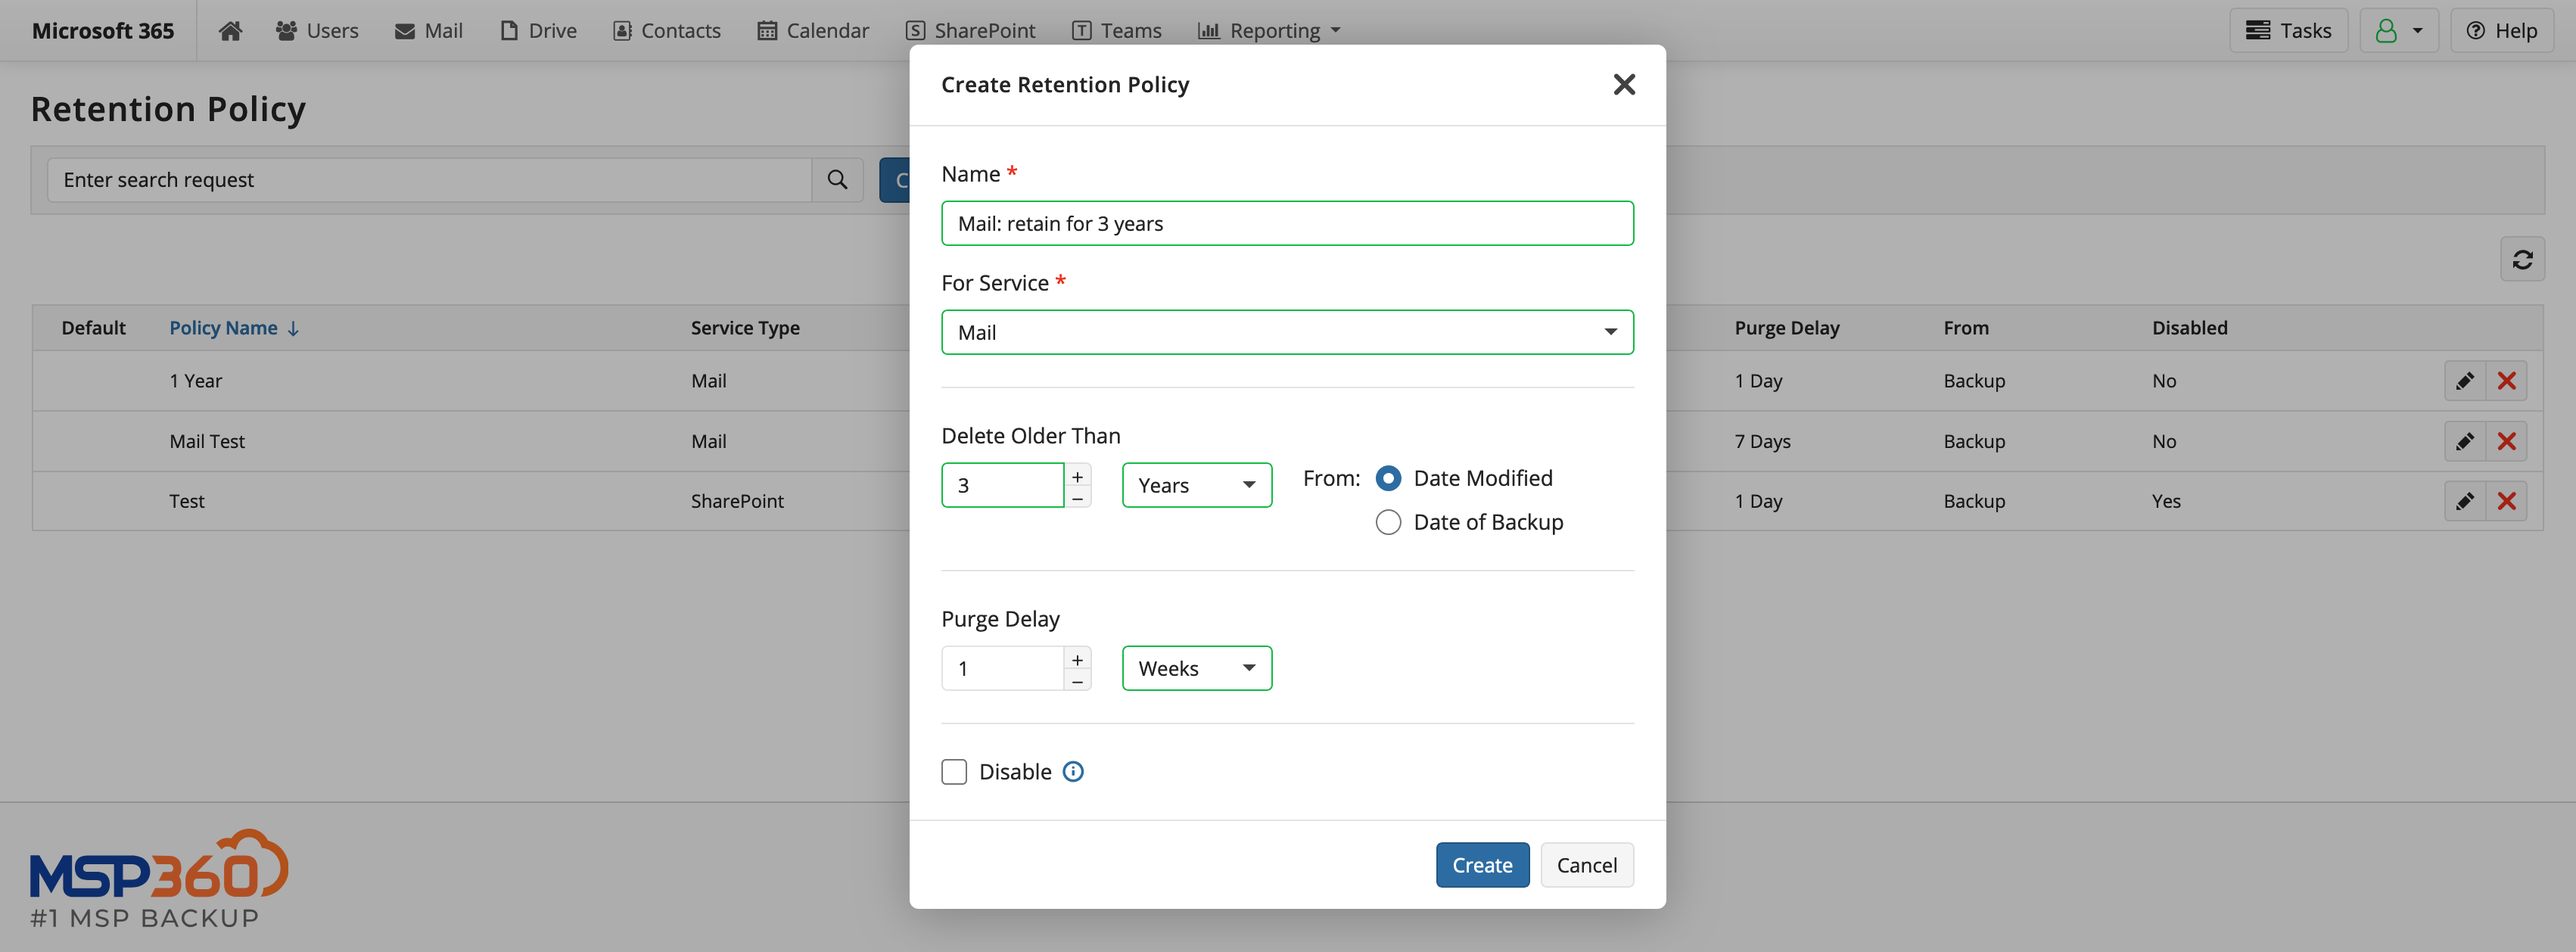
- Select the approach to retention: to keep backups for a guaranteed time or to keep a guaranteed number of recent revisions.Select Delete Older Than to retain backups for a guaranteed time since they were made or since the backed up data was last modified. It’s the optimal option when your backup plan must comply to organizational or regulatory requirements. Use the option “Always Keep the Latest Revision” as a safety net in your retention policy, making sure that no matter how much time has passed, there’s at least one backup copy retained.
 Select Revisions to Keep to retain a guaranteed number of revisions. It’s the optimal option when you have data which varies in usage, such as documents in OneDrive or Google Drive. With this approach to retention, you will know that your data has a set number of revisions available for restoring, no matter how often or rarely this data changes. This option is not available for Mail and Teams because data in them doesn’t have revisions.
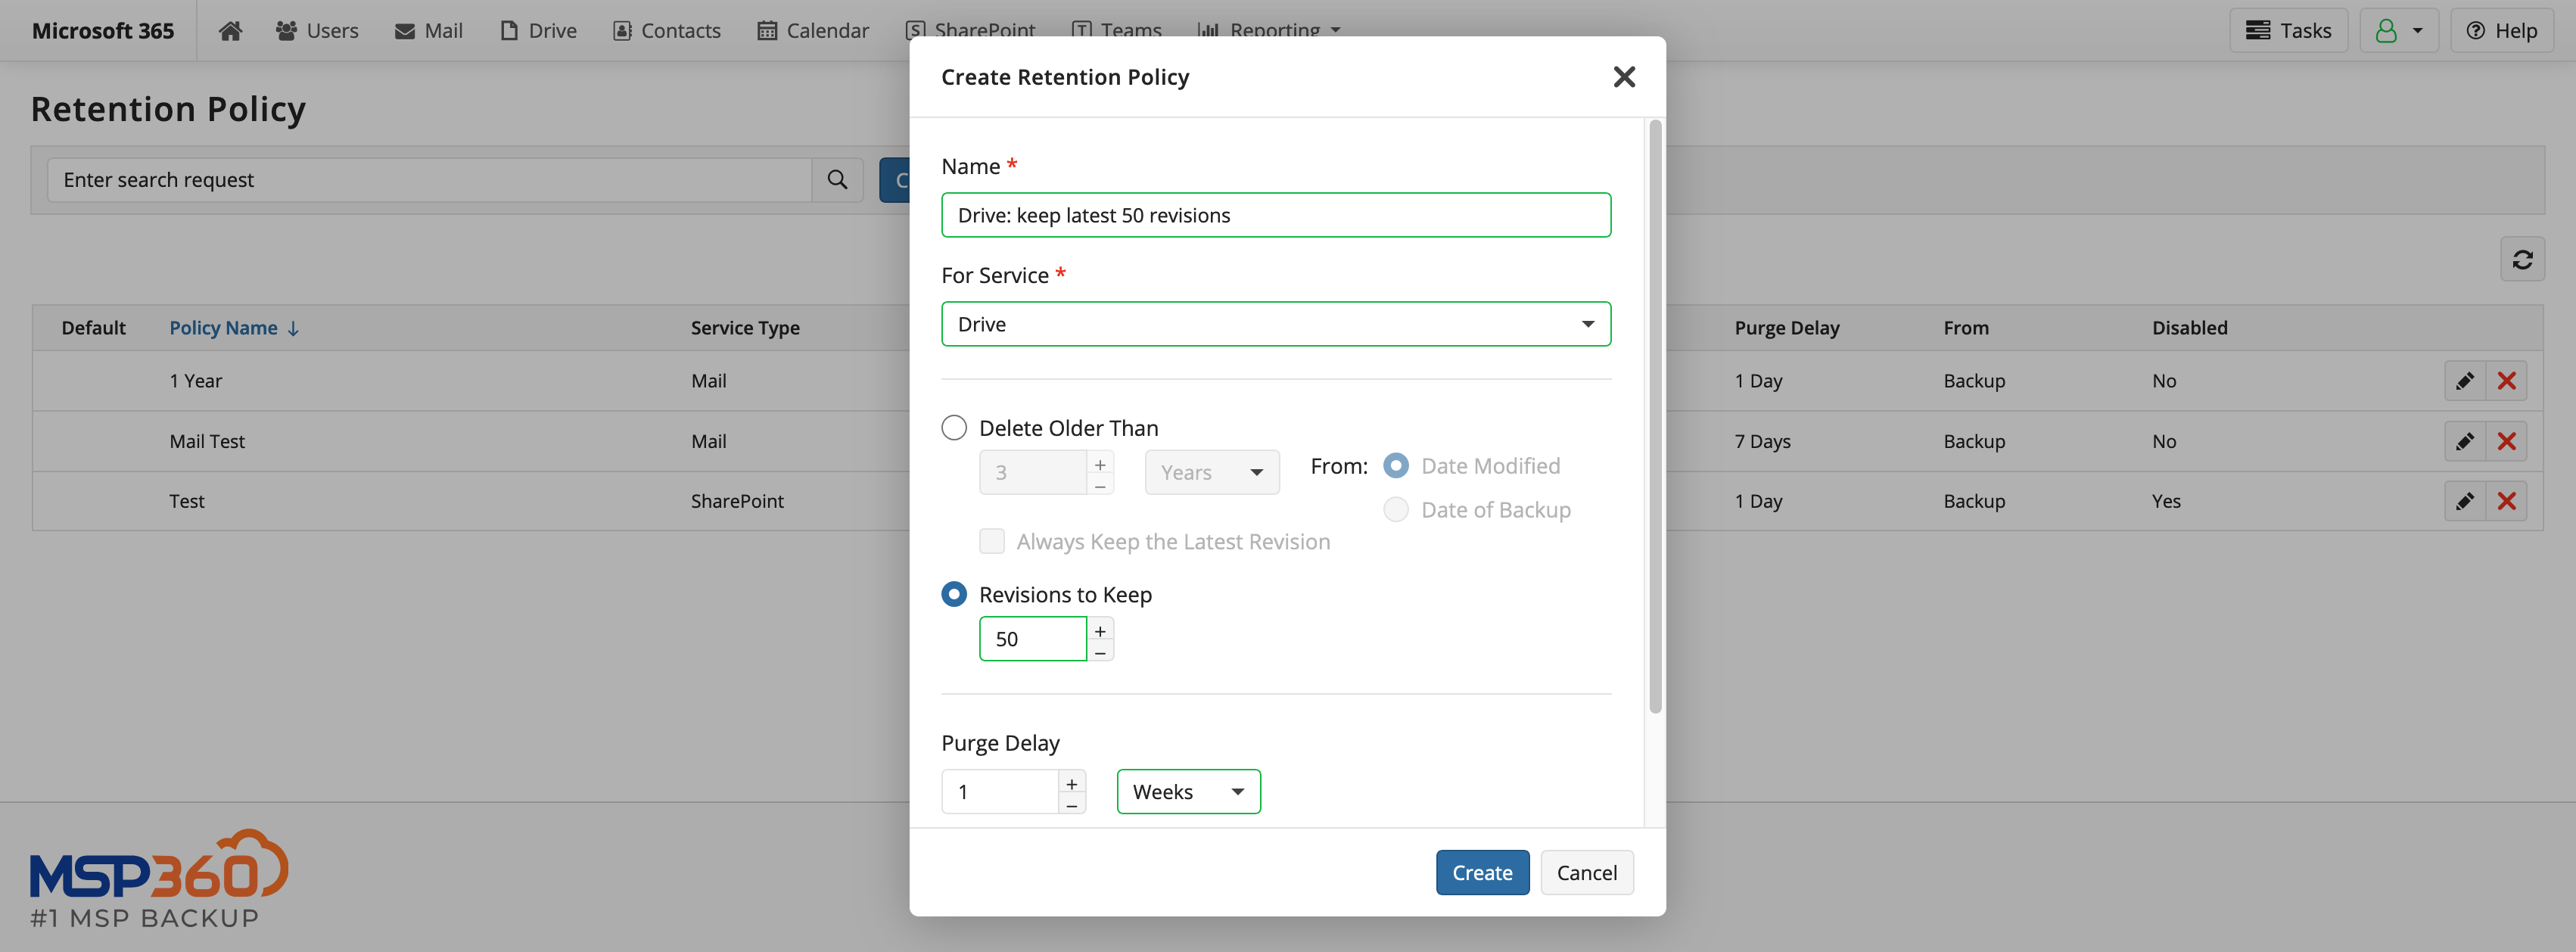
- Set the “Purge Delay” parameter. It acts as a safety net by adding extra buffer time before a backup copy is removed when it already matches the retention conditions.
- Finalize your settings and save the policy by clicking Create.
Assigning a Retention Policy
Why Assign a Retention Policy?
To make use of a retention policy, you must assign it to specific users and services. You can assign a policy to one or multiple users, or even set it as the default policy that applies to all users without a specific policy. Starting with well-configured default policies for each service is the best way to ensure all users have appropriate retention settings from the beginning.
Configure the Default Retention Policies
It’s good to start by selecting the default retention policy for each backed up service. It will be applied to all current and new users which don’t have a specific policy assigned to them.
- Access the Retention Policies Screen.In the MSP360 console, open the Account menu and navigate to Retention Policies:
- Set Up the Default Policy:
- Click Default Retention Policy.
- In the windows that opens, select the desired policies for the supported services (Mail, Drive, Contacts, etc.).
- To ensure the default policy applies to all users, including those with pre-existing retention settings, check the Apply to all users option.
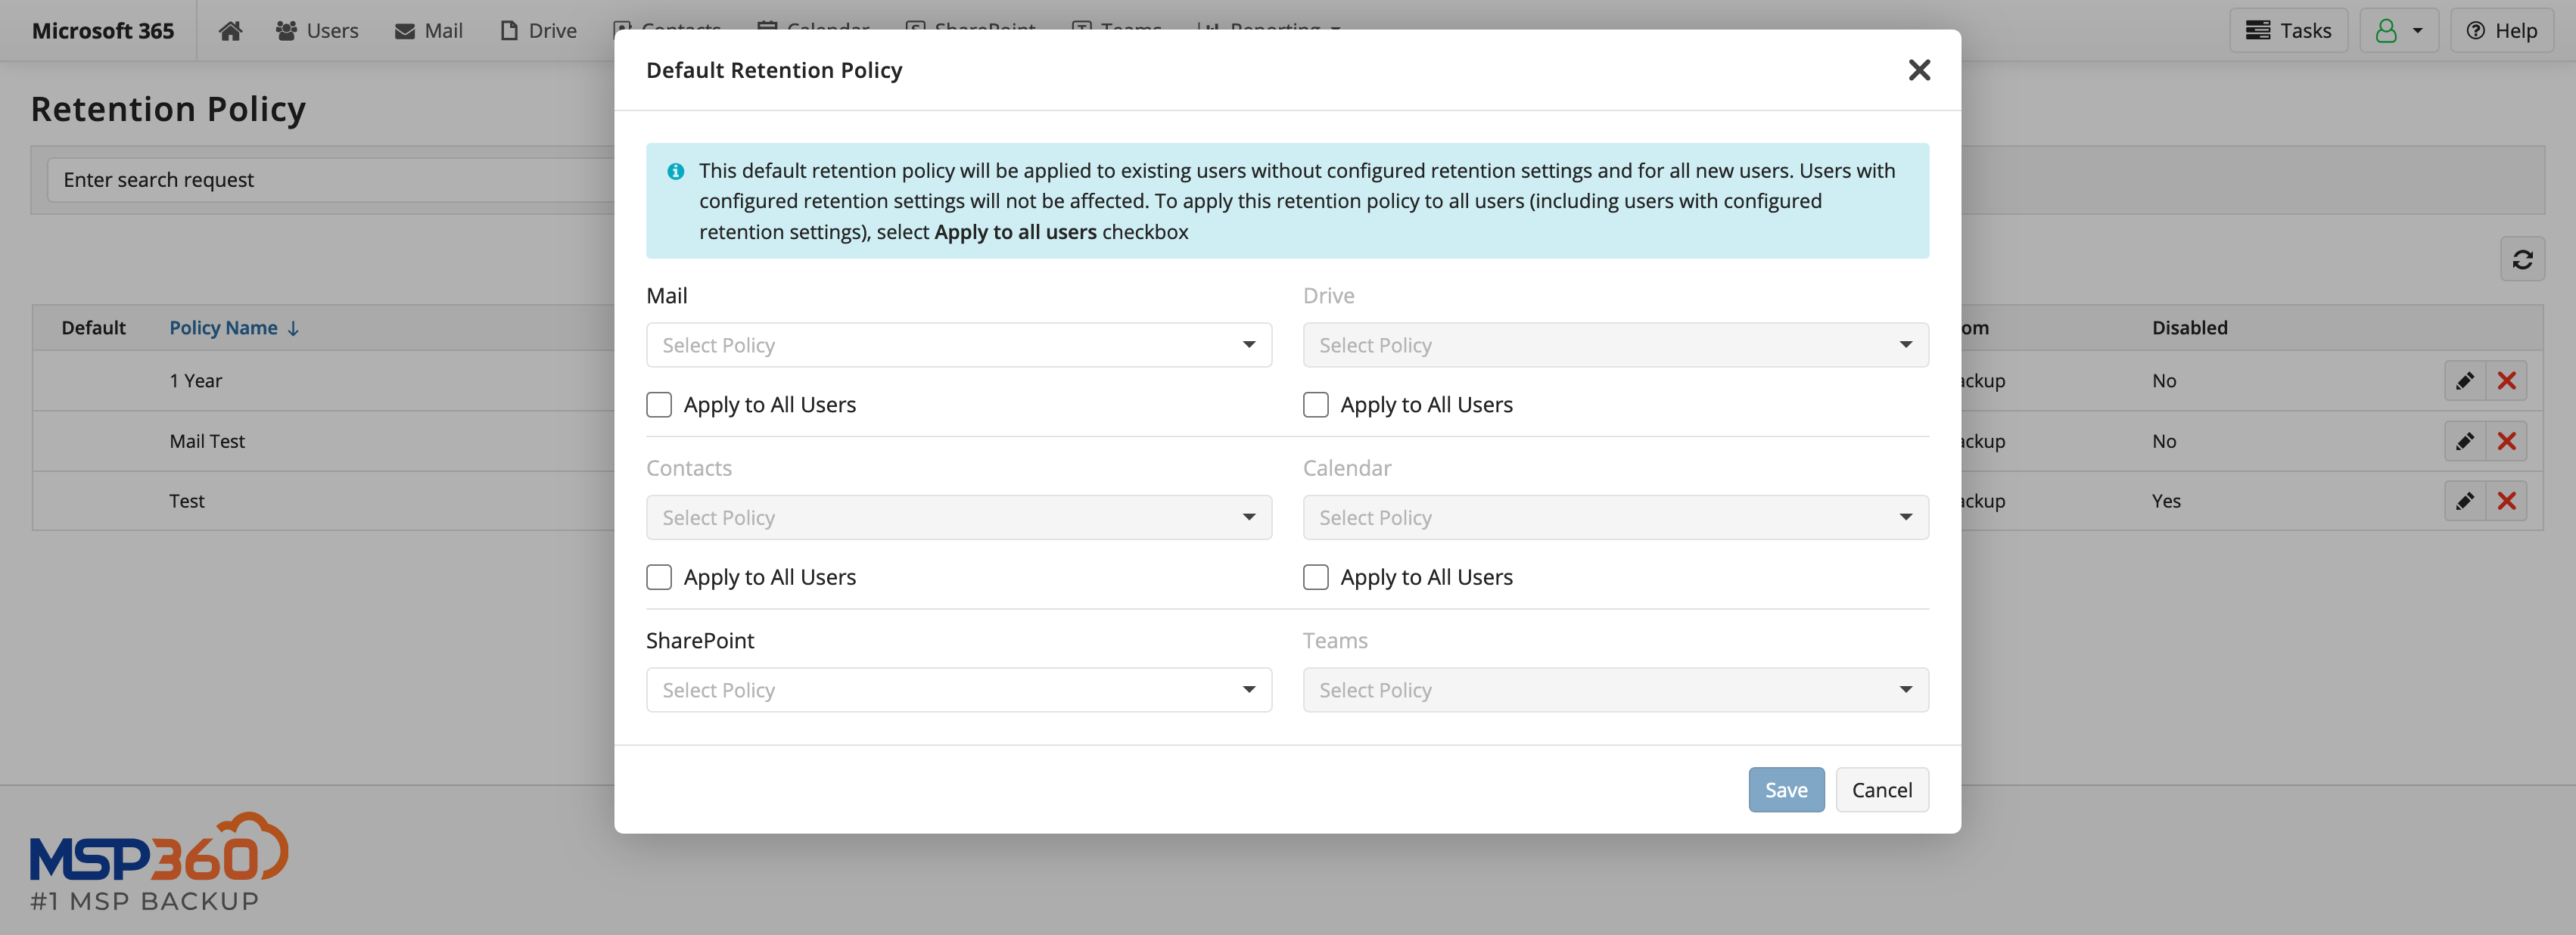
- Save Your Changes. Click Save to activate the default policy
Default retention policies are an efficient way to ensure that users without specific policies assigned still follow the organization’s data retention rules.
Assign a Retention Policy to a User
Of course, you can assign a retention policy to a specific users or a group of users at once.
- Select One or Multiple Users. Navigate to the Users tab in the MSP360 console and locate the user or group of users you want to assign a retention policy to.
- Select Retention Policy:
- Click Retention Policy button above the users list.
- In the slide-in pane on the right, select the appropriate retention policy for each service (Mail, Drive, Contacts, Calendar, etc.).
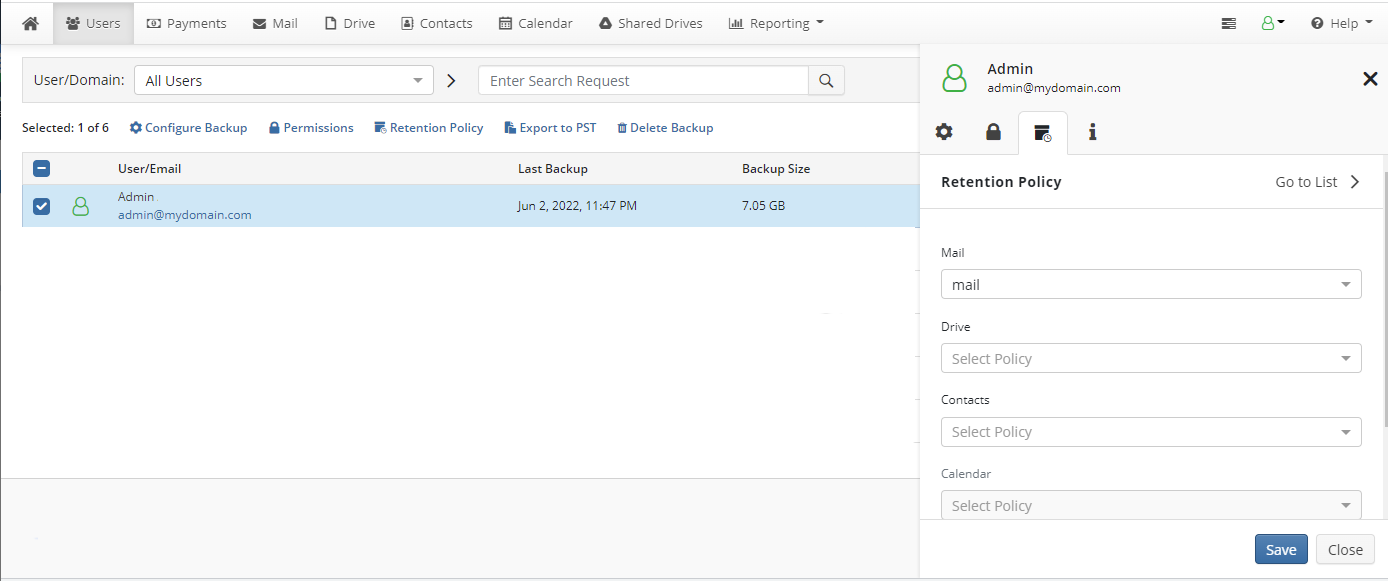
- Apply by Saving. Once you’ve selected the policies, click Save. The retention policy is now applied to selected users.
Retention policy won’t be enforced immediately when you apply it. Instead, it will be scheduled within the next 24 hours. Further on, the policy will be enforced daily without any need for management and control from your side.

By following the steps in this section, you have ensured that each user has the correct data retention settings, whether they use a default retention policy or a specific one.
Using Retention Policies with Immutable Storage
What is Immutable Storage?
Immutability (Object Lock) is a storage feature that ensures data cannot be modified or deleted for a specified period. This immutability is enforced by the storage provider, creating a secure environment where data remains untouchable until the retention period expires. It provides ransomware protection, and safeguards backup data from insider threats and accidental deletions.
How Immutable Storage Empowers Retention Policies
Retention policies have two important roles. First, they ensure backups are removed when they become stale, helping control storage usage and costs. On their own, retention policies are sufficient for this role.
Second, retention policies should also guarantee that backups are kept for a specified time. This assumes trust in the environment—that no one tampers directly with the storage, removing or modifying the backup copies. But can we truly trust that no internal or external actor will interfere?
A better approach is to adopt a zero-trust setup, where the ability to remove backups is not left to trust but is enforced at the storage level. Immutable storage makes this possible, ensuring that backups cannot be removed before their retention period expires, regardless of external actions or internal changes.
How Immutable Storage and Retention Policies Work Together
When backups are created on storage with Object Lock enabled and retention policies applied, the following occurs:
- New backup copies become immutable. Backup copies are locked upon creation and cannot be modified or deleted during the retention period.
- Changing retention policy impacts only subsequent backups. Even if a retention policy is modified or deleted, backup copies that were already created remain unaffected and locked until their original retention period expires. The storage provider enforces the retention period, ensuring data remains untouchable for the specified duration.
This integration creates a robust, zero-trust backup system where retention policies and immutable storage work together to protect data from any form of tampering.
Using immutable storage with retention policies ensures your backups are secure, compliant, and resilient to both internal and external threats.
Further reading Best Microsoft 365 Backup Solutions
Further reading Best Google Workspace Backup Solutions
Conclusion
Now you know how to set up and use retention policies in MSP360 SaaS backup solutions. If you have any further questions, feel free to contact our pre-sales team.
Further reading Top 6 Critical Mistakes in Microsoft 365 Data Protection