MSP360 Products
Getting Started with MSP360 Backup Free and MSP360 Backup Pro
From this guide, you will learn how to choose the correct MSP360 Backup edition based on your requirements, sign up for the product, and start your first backup plan.
MSP360 Free vs. MSP360 Backup Pro: What’s the Difference?
To select the correct edition of MSP360 Backup, you need to choose according to your use case: if your data protection needs include several endpoints, you should opt for MSP360 Backup Pro, as this solution supports up to 5 devices. In case you need a solution for personal needs (like backing up a laptop at home), then our Free Backup software is the right choice.
Both solutions support file-level desktop backup for Windows, macOS, and Linux, along with image-based backup for Windows—making them a strong choice if you’re looking for reliable Windows backup software. However, the main difference is that MSP360 Backup Pro also supports backups for Windows Server, SQL Server, and virtual machines.
Getting Started with MSP360 Backup
To start using MSP360 Free or MSP360 Backup Pro, navigate to this website page, and select the required edition. On the next step, find your endpoint’s operating system in the drop-down list, and complete the form.
MSP360 Backup Free supports backup for Windows, macOS, and Linux, while MSP360 Backup Pro additionally supports Windows Server, Hyper-V, VMware, and MS SQL Server, along with all the operating systems supported by the Free edition.
Once completed, install the solution on your endpoint. Once the backup agent is downloaded and installed, you will be able to choose between a solution for personal use (MSP360 Backup Free) and a solution for managing up to 5 devices (MSP360 Backup Pro).
Create Your First Backup Plan
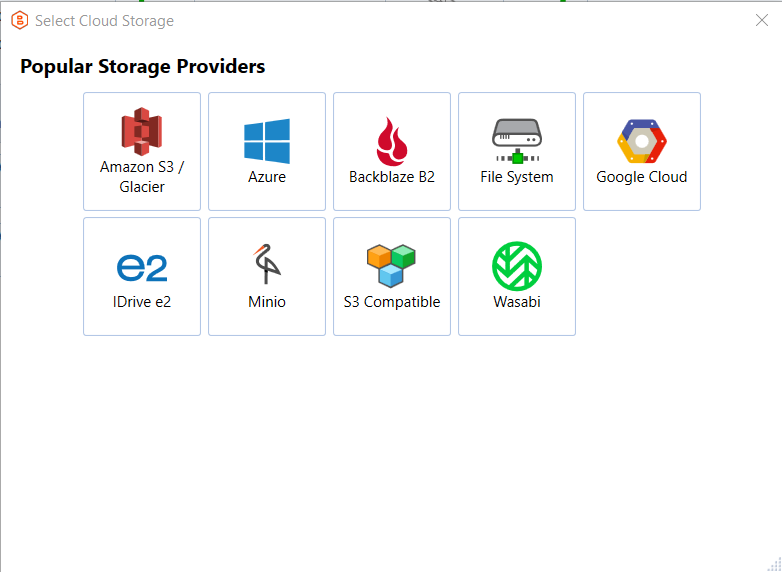
To start creating your first backup plan, you need to add a storage account first. To do that, click the menu icon in the upper-left corner and proceed to the Add Storage Account section. Then, select the desired storage provider from the list and configure the settings to connect to the storage account.
MSP360 Backup supports the BYOC (Bring Your Own Cloud) approach - our solution is compatible with Amazon S3, Wasabi, Backblaze B2, and other leading cloud providers.

Once your storage account is connected, proceed to the backup plan creation. To start creating your file backup plan, click the Files icon in the navigation panel, and follow the steps in the backup wizard to configure your plan. MSP360 file backup software features an intuitive UI and step-by-step backup plan wizards, making setup and maintenance easy.

On the Select Backup Storage step, select a cloud storage account where you want to back up your data. Please note that some features that are supported for one storage provider may not be available for others, so it’s important to select the cloud storage based on your specific requirements. For instance, if you choose Azure as your storage destination, you will be able to select a storage class (Hot, Cool, Cold, Archive) based on your needs, while this option is unavailable for Wasabi Hot Cloud storage as Wasabi does not support storage tiering.
You can also opt for local storage as a backup destination including external hard drive or network locations such as NAS devices.
With file backup, you can select specific files or folders on your endpoint on the Backup Source step. Once you’ve specified files and folders to back up, proceed to the next step.
Once you reach the Compression and Encryption Options step, you can choose whether to enable these features. MSP360 Backup helps reduce storage usage with built-in compression, minimizing backup size to save space and optimize performance. Also, here you can enable encryption in order to enhance data protection.
Please note that this feature is not available in MSP360 Backup Free.
In the next steps, you can configure a backup schedule that fits your IT routines. The settings allow for as much granularity as you need: you can schedule backups to run every 10 minutes during work hours, perform a daily backup at 2 AM, or set up a monthly backup to an external drive or cloud storage.

Also, you can configure retention policy settings and specify how long you need to keep your file versions. Please note that Intelligent Retention is enabled by default with some storage providers to avoid early deletion fees. For instance, if a cloud storage provider sets a 90-day minimum storage period, and the data was removed on the 30th day, you will be charged a penalty called early deletion fee.
Also, you can enable Object Lock (immutability) for Amazon S3, Wasabi Hot Cloud Storage and Backblaze B2 to implement the highest level of backup protection possible, and make cloud backups resilient against ransomware, unattended access, and human factors.
On one of the final steps, Notifications and Logging, we recommend enabling notifications to help identify issues before they impact business operations. Once that’s done, click Next to complete the creation of your backup plan.
Conclusion
With MSP360 Backup, getting started is fast, simple, and tailored to your needs. Start the free trial today, or contact our sales team if you have any questions.

