Storage
Getting Started with MSP360 Backup Free and IDrive e2
In this blog post, we’ll provide a step-by-step guide on how to connect MSP360 Backup free and iDrive e2 storage account. MSP360 Backup freeware isn't just a basic tool; it's a comprehensive solution offering robust features, including recently introduced image-based backup, object lock, and an impressive increase to 5 TB of free storage. Yes, you read that right – 5 terabytes of free storage to protect your most important files!
MSP360 Backup Free - Overview
MSP360 Free Backup software is a reliable, cross-platform solution designed for personal data backup on Windows, Linux, and macOS. MSP360 Backup Free provides reliable data protection, and with recently introduced image-based backup, object lock and increase to 5 TB of storage, you can safeguard your valuable data at no cost.
MSP360 cloud backup software allows you to store your backup data on a local device as well as in the cloud storage. With the direct integration with iDrive e2 you can take advantage of IDrive e2's fast and scalable cloud-object storage to ensure your data protection needs are fully covered.
Simplified Setup for Maximum Protection
Getting Started with MSP360 Backup Free and IDrive e2 focuses on making the process as straightforward as possible. You don’t need to be an IT expert to secure your data effectively. The integration between MSP360 Backup Free and IDrive e2 is designed for simplicity, from creating your access keys and buckets to configuring your backup plans.
This ease of use means you can quickly get your data protected without a steep learning curve, allowing you to focus on what matters most to you.
Why MSP360 Free Backup Software Utilizes the Best Technologies for IDrive e2
MSP360's integration with IDrive e2 isn't just a simple connection; it's built on leveraging the best technological advantages of both platforms to provide a superior backup experience. Here are the steps:
Step1. Create an IDrive e2 Storage Account
Step 2. Create Access Key and Secret Key
Step 3. Create a Bucket
Step 4. Download, install and activate MSP360 Backup freeware Step 5. Add your IDrive e2 storage account as a backup destination
Step 6. Create a Backup Plan
Step1. Create an IDrive e2 Storage Account
If you already have an IDrive e2 storage account, you can proceed to Step 2. If not, here’s how to get started with IDrive e2:
- Complete the signup form on their website.
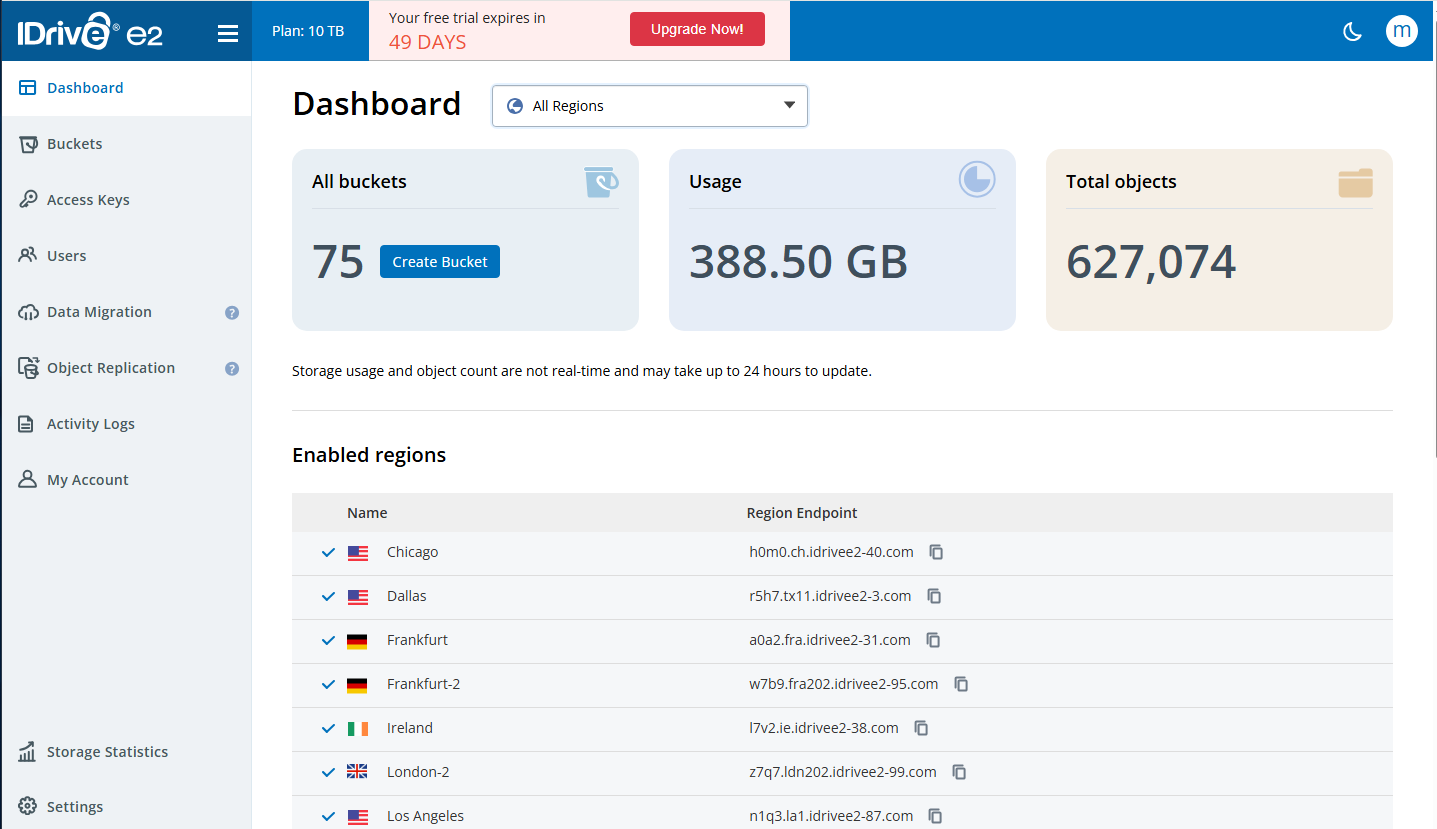
- You’ll then be redirected to the Dashboard in the IDrive e2 web console, where you can manage and configure your account.
- Once that’s done, you are all set.

Step 2. Create Access Key and Secret Key
To start working with IDrive e2, you’ll need to create an access key and secret key pair. This can be done in the Access Keys tab: first, click the Create Access Key button, enter a name, and select a region from the list. Next, assign the appropriate permissions and buckets for this access key.
Once the access key and secret key pair is generated, make sure to save it, because this information will not be available again. You’ll need these keys to connect MSP360 Backup to your IDrive e2 storage account.
Step 3. Create a Bucket
To start working with a bucket, go to the Dashboard page and select the desired location. Then, open the Buckets tab and click Create Bucket. From there, you can configure access settings, enable object lock, set up encryption, and more for this specific bucket.
Step 4. Download, install and activate MSP360 Backup freeware
To start using MSP360 Backup Free, download the agent on your target endpoint. After installation, select Use Home Edition to proceed with the solution for personal use.
Step 5. Add your IDrive e2 storage account as a backup destination
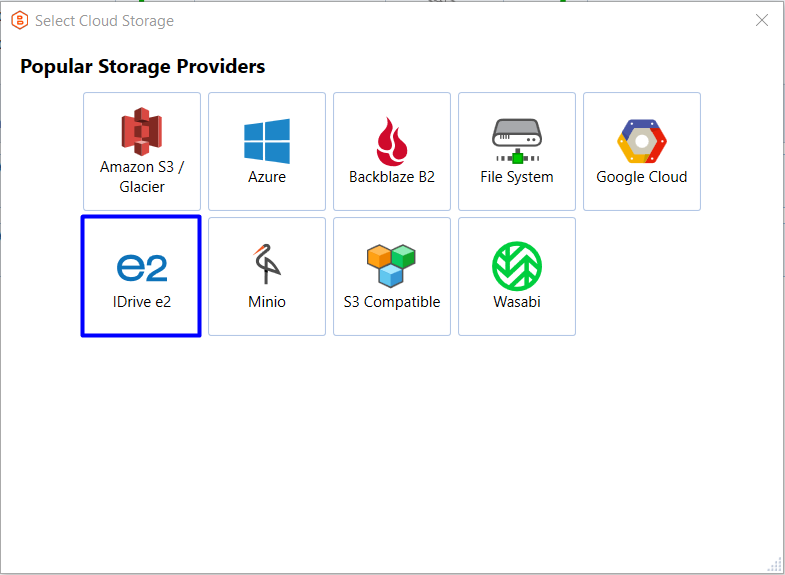
Adding IDrive e2 as a storage destination is pretty simple and straightforward: open the menu on the left side of the agent, find the Add New Account button, and select IDrive e2 from the list.

Set up your IDrive e2 storage account settings by entering the account display name, access key, and secret key. Then, select the desired bucket from the drop-down list and specify whether you’d like to enable object lock (immutability).
Object lock (immutability) protects your data from alterations or deletions, ensuring maximum data safety.
Once completed, your new IDrive e2 storage account will appear in the list of accounts within the agent.
Step 6. Create a Backup Plan
To create your first file-level backup plan with MSP360 file backup software, click the Files icon in the upper-left corner.

On the second step, select IDrive e2 as your storage destination, then follow the backup wizard to customize your backup plan.
With this backup plan wizard, you can select which files or folders to back up, set up custom schedules, configure retention policy settings and specify how long you need to keep your file versions.
If you choose to create an image-based backup plan (now available in MSP360 Backup Free), you’ll be able to capture a complete snapshot of your system and enable object lock for maximum data protection with MSP360 Backup Free and IDrive e2.

Further reading How to create a file-level backup plan with MSP360 Backup Free
Further reading How to create an image-based backup plan with MSP360 Backup Free
Conclusion
Securing your data doesn’t have to be complicated or expensive. With MSP360 Backup Free and its seamless integration with IDrive e2, you gain a powerful, user-friendly, and most importantly, free solution to protect your digital life. Dive into our blog post and start safeguarding your valuable data today. Getting started with MSP360 Backup Free and IDrive e2 is quick and simple. Start protecting your data today with a reliable, scalable solution.

